
How to use a Virtual Camera in a Live Stream?
Stream with Virtual Camera
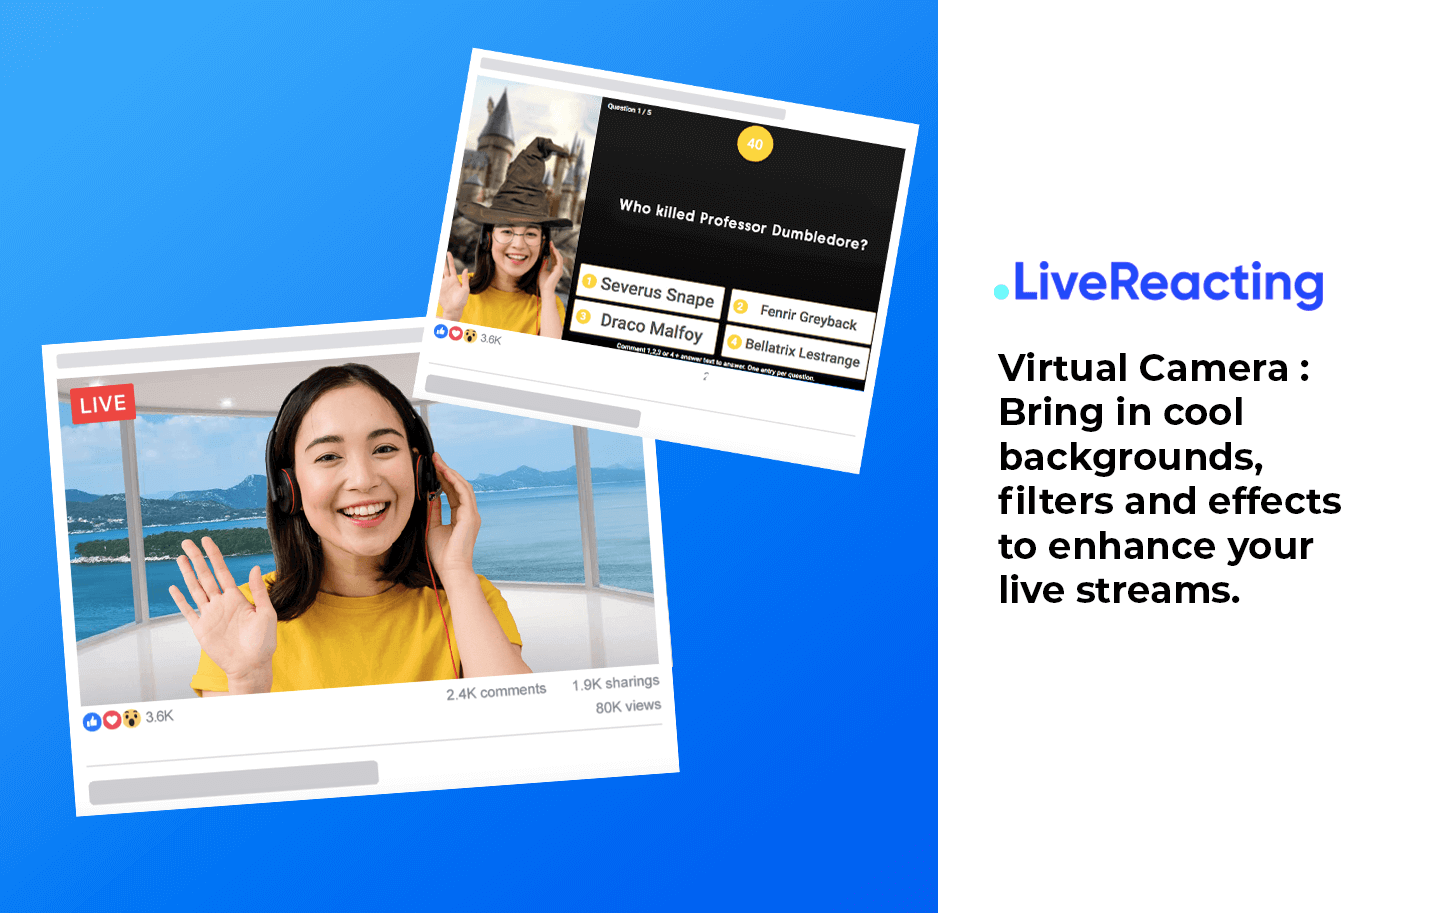
A virtual camera is a great tool to enhance your stream with some cool backgrounds filters and make it more fun and engaging. The great news is - you can use a virtual camera in your live streams. Here are some perks of using a virtual webcam for streaming:
- Change your regular background to a new one
- Improve lightening
- Glow up your appearance
- Add some fun in the stream
- Stand out from your competition
- Give your streams a fresh look and re-engage your audience
You can choose many apps for setting up your virtual camera: ManyCam, ChromaCam, and SnapCamera, which we've picked as a reference for this tutorial. We choose to use SnapCamera for this tutorial, and before we show you how to set up a SnapCamera for streaming, here are some ideas on how you can enhance your live stream using a virtual background:
Virtual Background for Streaming Examples
- Change your regular backdrop to something new. Let's say you're giving a class – then you can add a school setting as your virtual background. Or, if the goal is to give your stream a more professional look, you can change the background to an office setting. Some of the lenses we recommend: Office Gustavo, Blur Bookshelf filter.

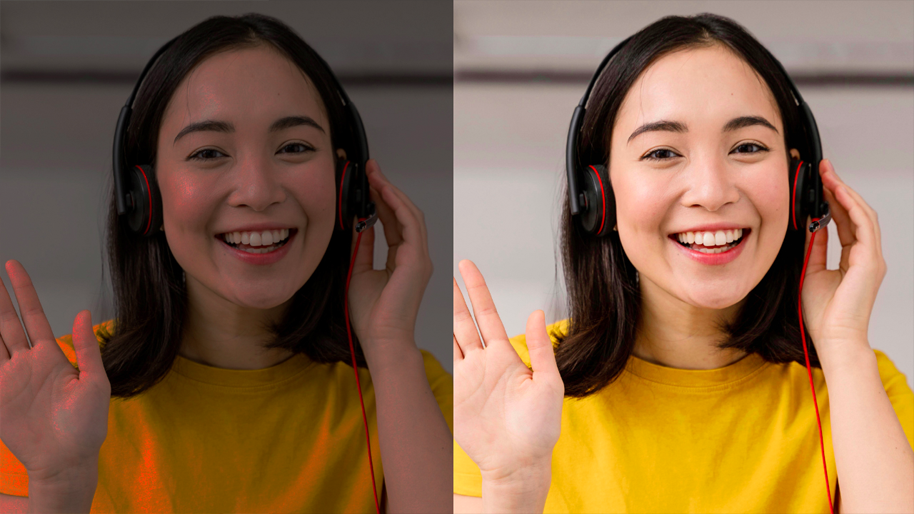
- Switch on the light! SnapCamera has some lighting filters that can improve the quality of your live video. Try Summer Light lense for some subtle and warm summer glow.
- Apply a fun filter to engage with your audience. For example, you stream a live trivia game on a movie theme: so you look up a relevant filter in SnapCamera and use it in your stream.
P.s. If you are not familliar with a live trivia game, check this step-by-step tutorial, because it is a great way to boost engagement on Facebook.

As we mentioned earlier, one of the great tools that can allow setting a virtual background and applying filters to your streams is a SnapCamera. It's absolutely free to use, and you can download it for both Windows and Mac operating systems. So, how do you set up the SnapCamera?
How to set up a virtual background for live streaming?
- Click here to download SnapCamera, agree to terms & conditions and install the app.
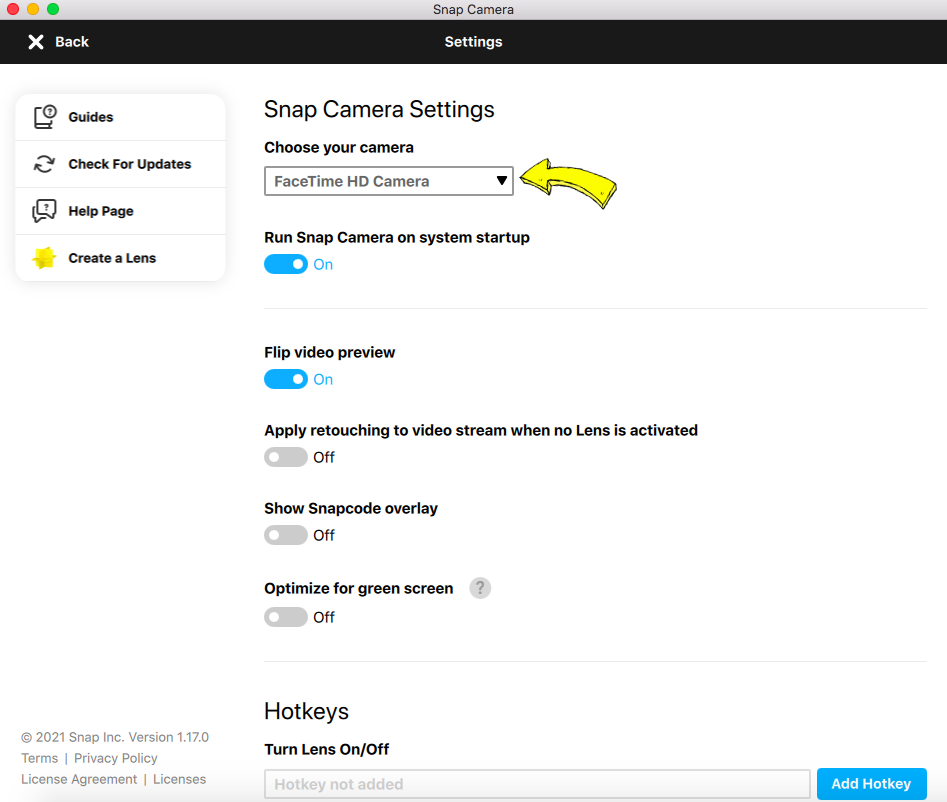
- Open the app and press the gear icon on the top-right to go to settings and select your preferred camera under "Choose your camera."
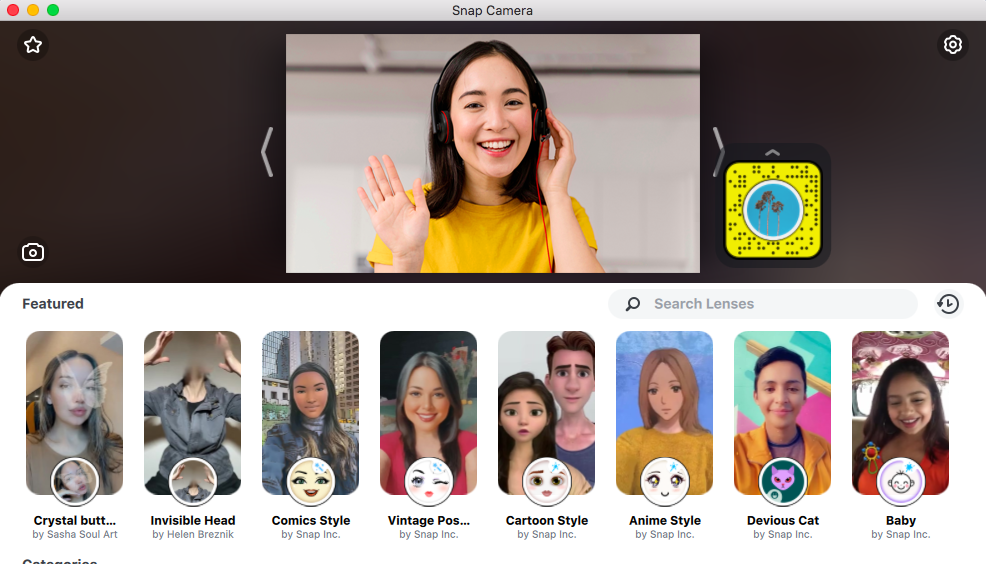
- Click ‘Back’ on the top left to go back to the home page of SnapCamera and now you can browse some cool filters and backgrounds.
How to add a virtual background in a live stream using LiveReacting?
Once you've found the lens you want to use, here is how you add a virtual camera in a live stream:
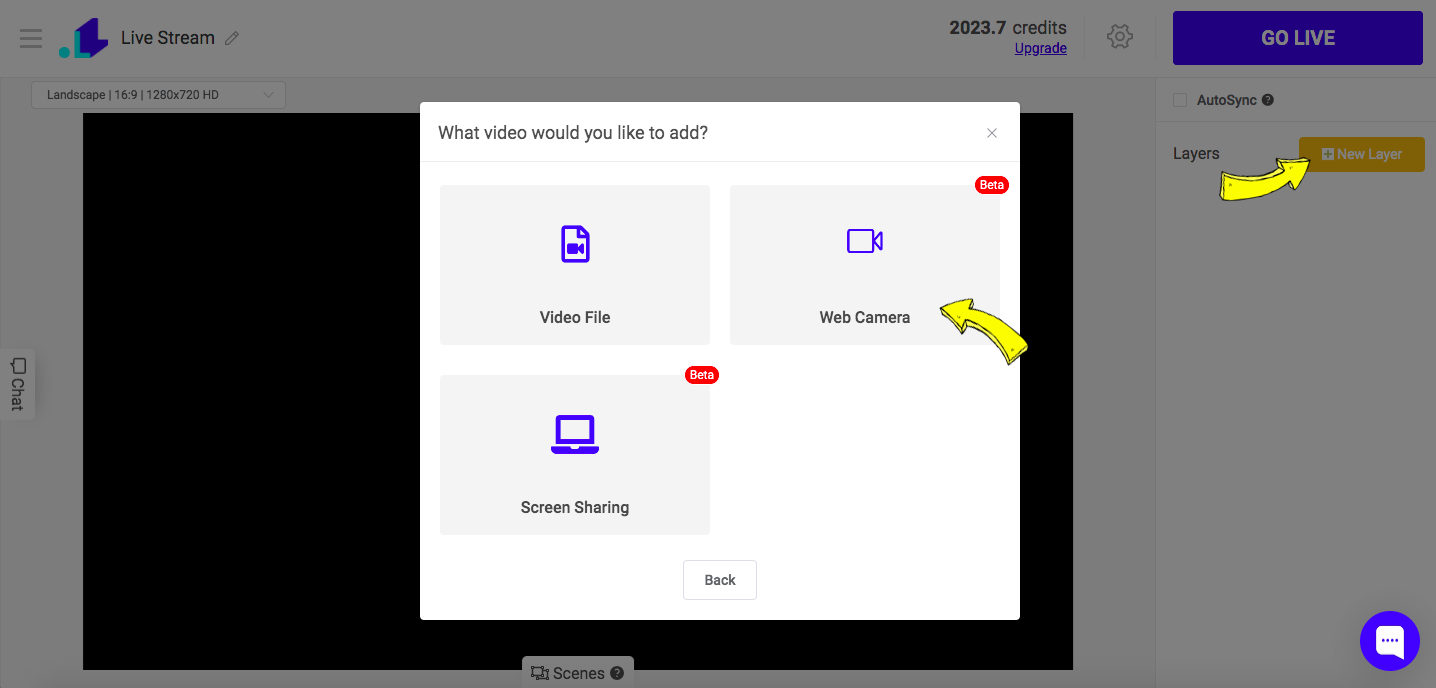
- Open LiveReacting Studio and create a broadcast, or open your previously saved project.
- Click New Layer > Video > Web camera
- Choose Snap Camera as a camera source and click Connect.
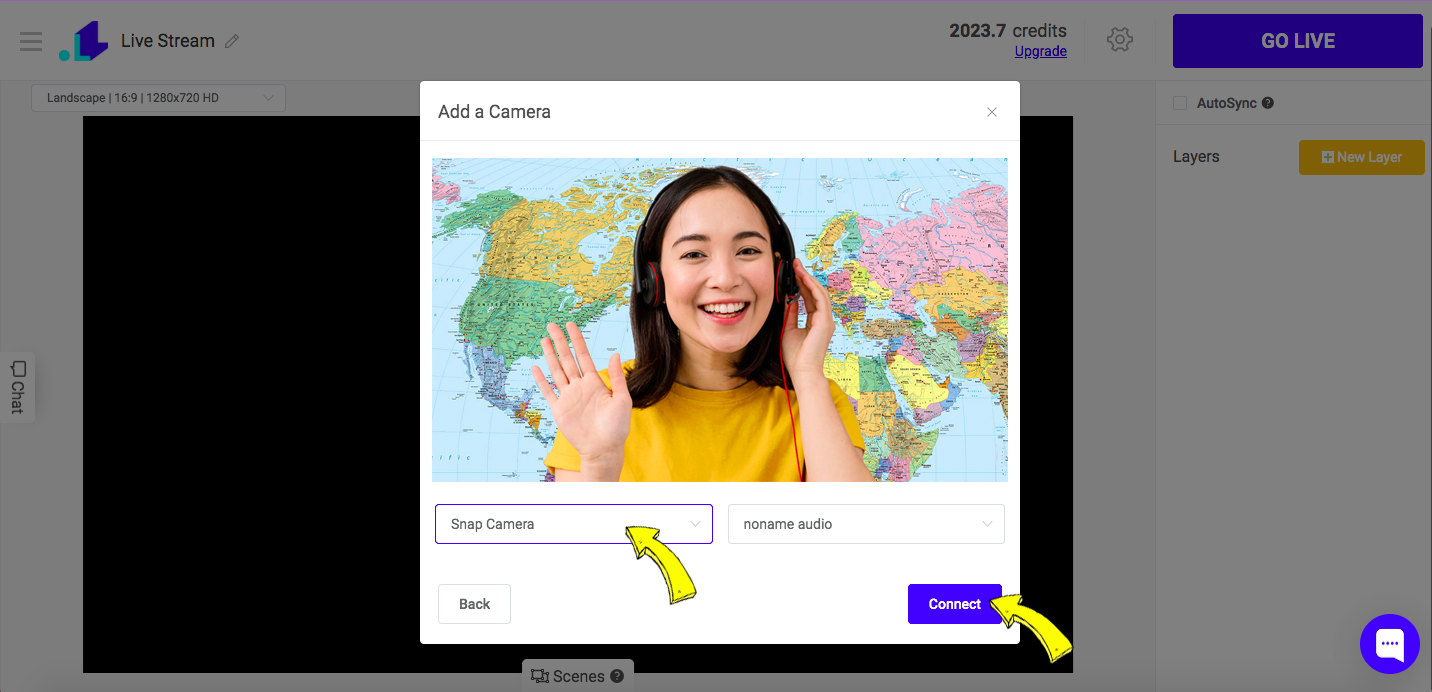
- Now you have your virtual background connected, and if you're ready to launch the stream, click Settings (Gear Icon) > fill out the info and Press Go Live.
Send us a message in the live chat on our website and we'll be glad to share about other interactive elements, which you can add into your live streams to generate more views.
Transform Your Live Streams with LiveReacting
Join 10,000+ streamers who are boosting engagement and viewership by adding pre-recorded videos, games, polls, and countdowns to their streams.
Try LiveReacting for free today and take your streams to the next level!