
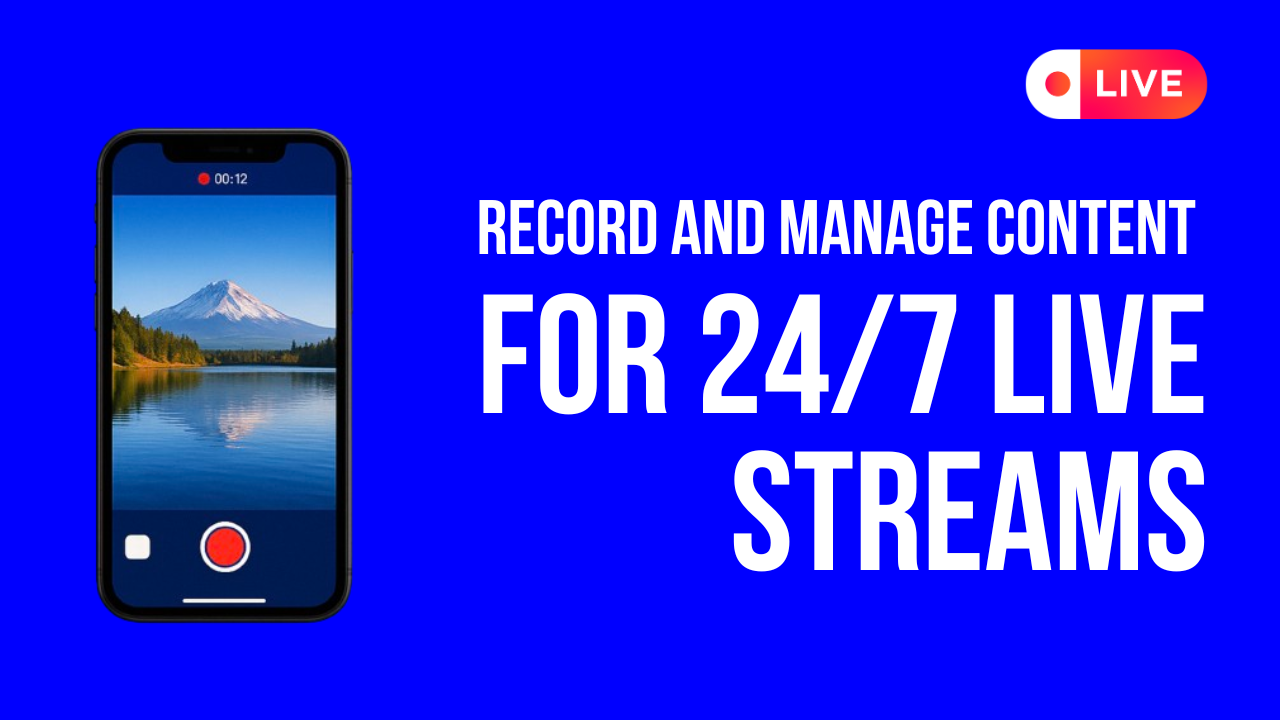
How to Record and Manage Content for 24/7 Live Streams on iPhone
Decided to start recording a video for a live stream on iPhone, but don’t know where to begin? The idea is more than promising — today any social platform can help you grow an audience and even build a stable income. An iPhone can easily replace a camera and mic, letting you record games, podcasts, meditations, or reactions without studio gear. There’s always demand for this type of content on YouTube and Twitch. But here comes the problem: how do you ensure that your iPhone’s memory (whether 128 GB, 256 GB, or more) doesn’t get clogged after just a few sessions? And what if your phone freezes or overheats during a marathon recording session?
Please do not panic, as in this article, we’ll go through all the practical nuances step by step. And while you might not be able to launch your channel “today” right after reading, you’ll see why just a few days of preparation is all you need to make your stream work.
Why 24/7 Streaming Needs So Much Content?
A 24/7 stream sounds simple in theory — upload a few videos, hit play, and let the channel run. But in practice, nonstop streaming requires hundreds of hours of unique content to keep viewers engaged.
If your stream keeps showing the same clip or segment, people will leave — they expect variety. For example, if you prepare just 10 hours of video, it will repeat over 70 times in a single month. Loyal viewers will notice the pattern in a matter of days. To keep your stream feeling fresh, you need a large enough library that can rotate without obvious repetition. Platforms like YouTube and Twitch also reward longer watch times. The more content you can cycle through, the more likely your audience will stay tuned in, interact with the chat, and eventually subscribe or support your channel.
This is why building a content library becomes step one. Instead of recording a single video, it’s better to record streaming video on iPhone in smaller blocks (for example, 30-90 minutes each). Once combined, these clips form a pool of material you can schedule for weeks of continuous streaming. To make a 24/7 stream feel fresh, you want at least 100-150 hours of unique video before you even think about going live. That much content gives you roughly four to six days of programming before anything repeats. If you aim for 300 hours, you’re covering close to two weeks without an obvious loop, and that’s where long-term viewers start sticking around.
How to Prepare an iPhone for Recording Streaming Video
Before you start recording streaming video on iPhone, you need to make sure the device is ready for the job. Long sessions push your phone harder than a quick selfie or a five-minute clip, so preparation makes the difference between smooth recording and a stream that cuts off halfway.
Step 1. Check the Storage of Your iPhone
We’ve already figured out that a 24/7 live stream requires a huge amount of content, and every clip takes up space. A single recording that runs 60-90 minutes can weigh several gigabytes. Now imagine building a full library for your stream: dozens or even hundreds of these files. You can quickly calculate how much free space you’ll need, but one thing is clear — iPhone storage fills up fast.
Before recording, make sure your phone has enough room to handle it. Here’s how you can check:
- Open Settings > General > iPhone Storage.
- Wait a few seconds for the system to calculate, and you’ll see a colored bar showing how much space is used and how much remains, along with a breakdown by apps, photos, media, and other data.
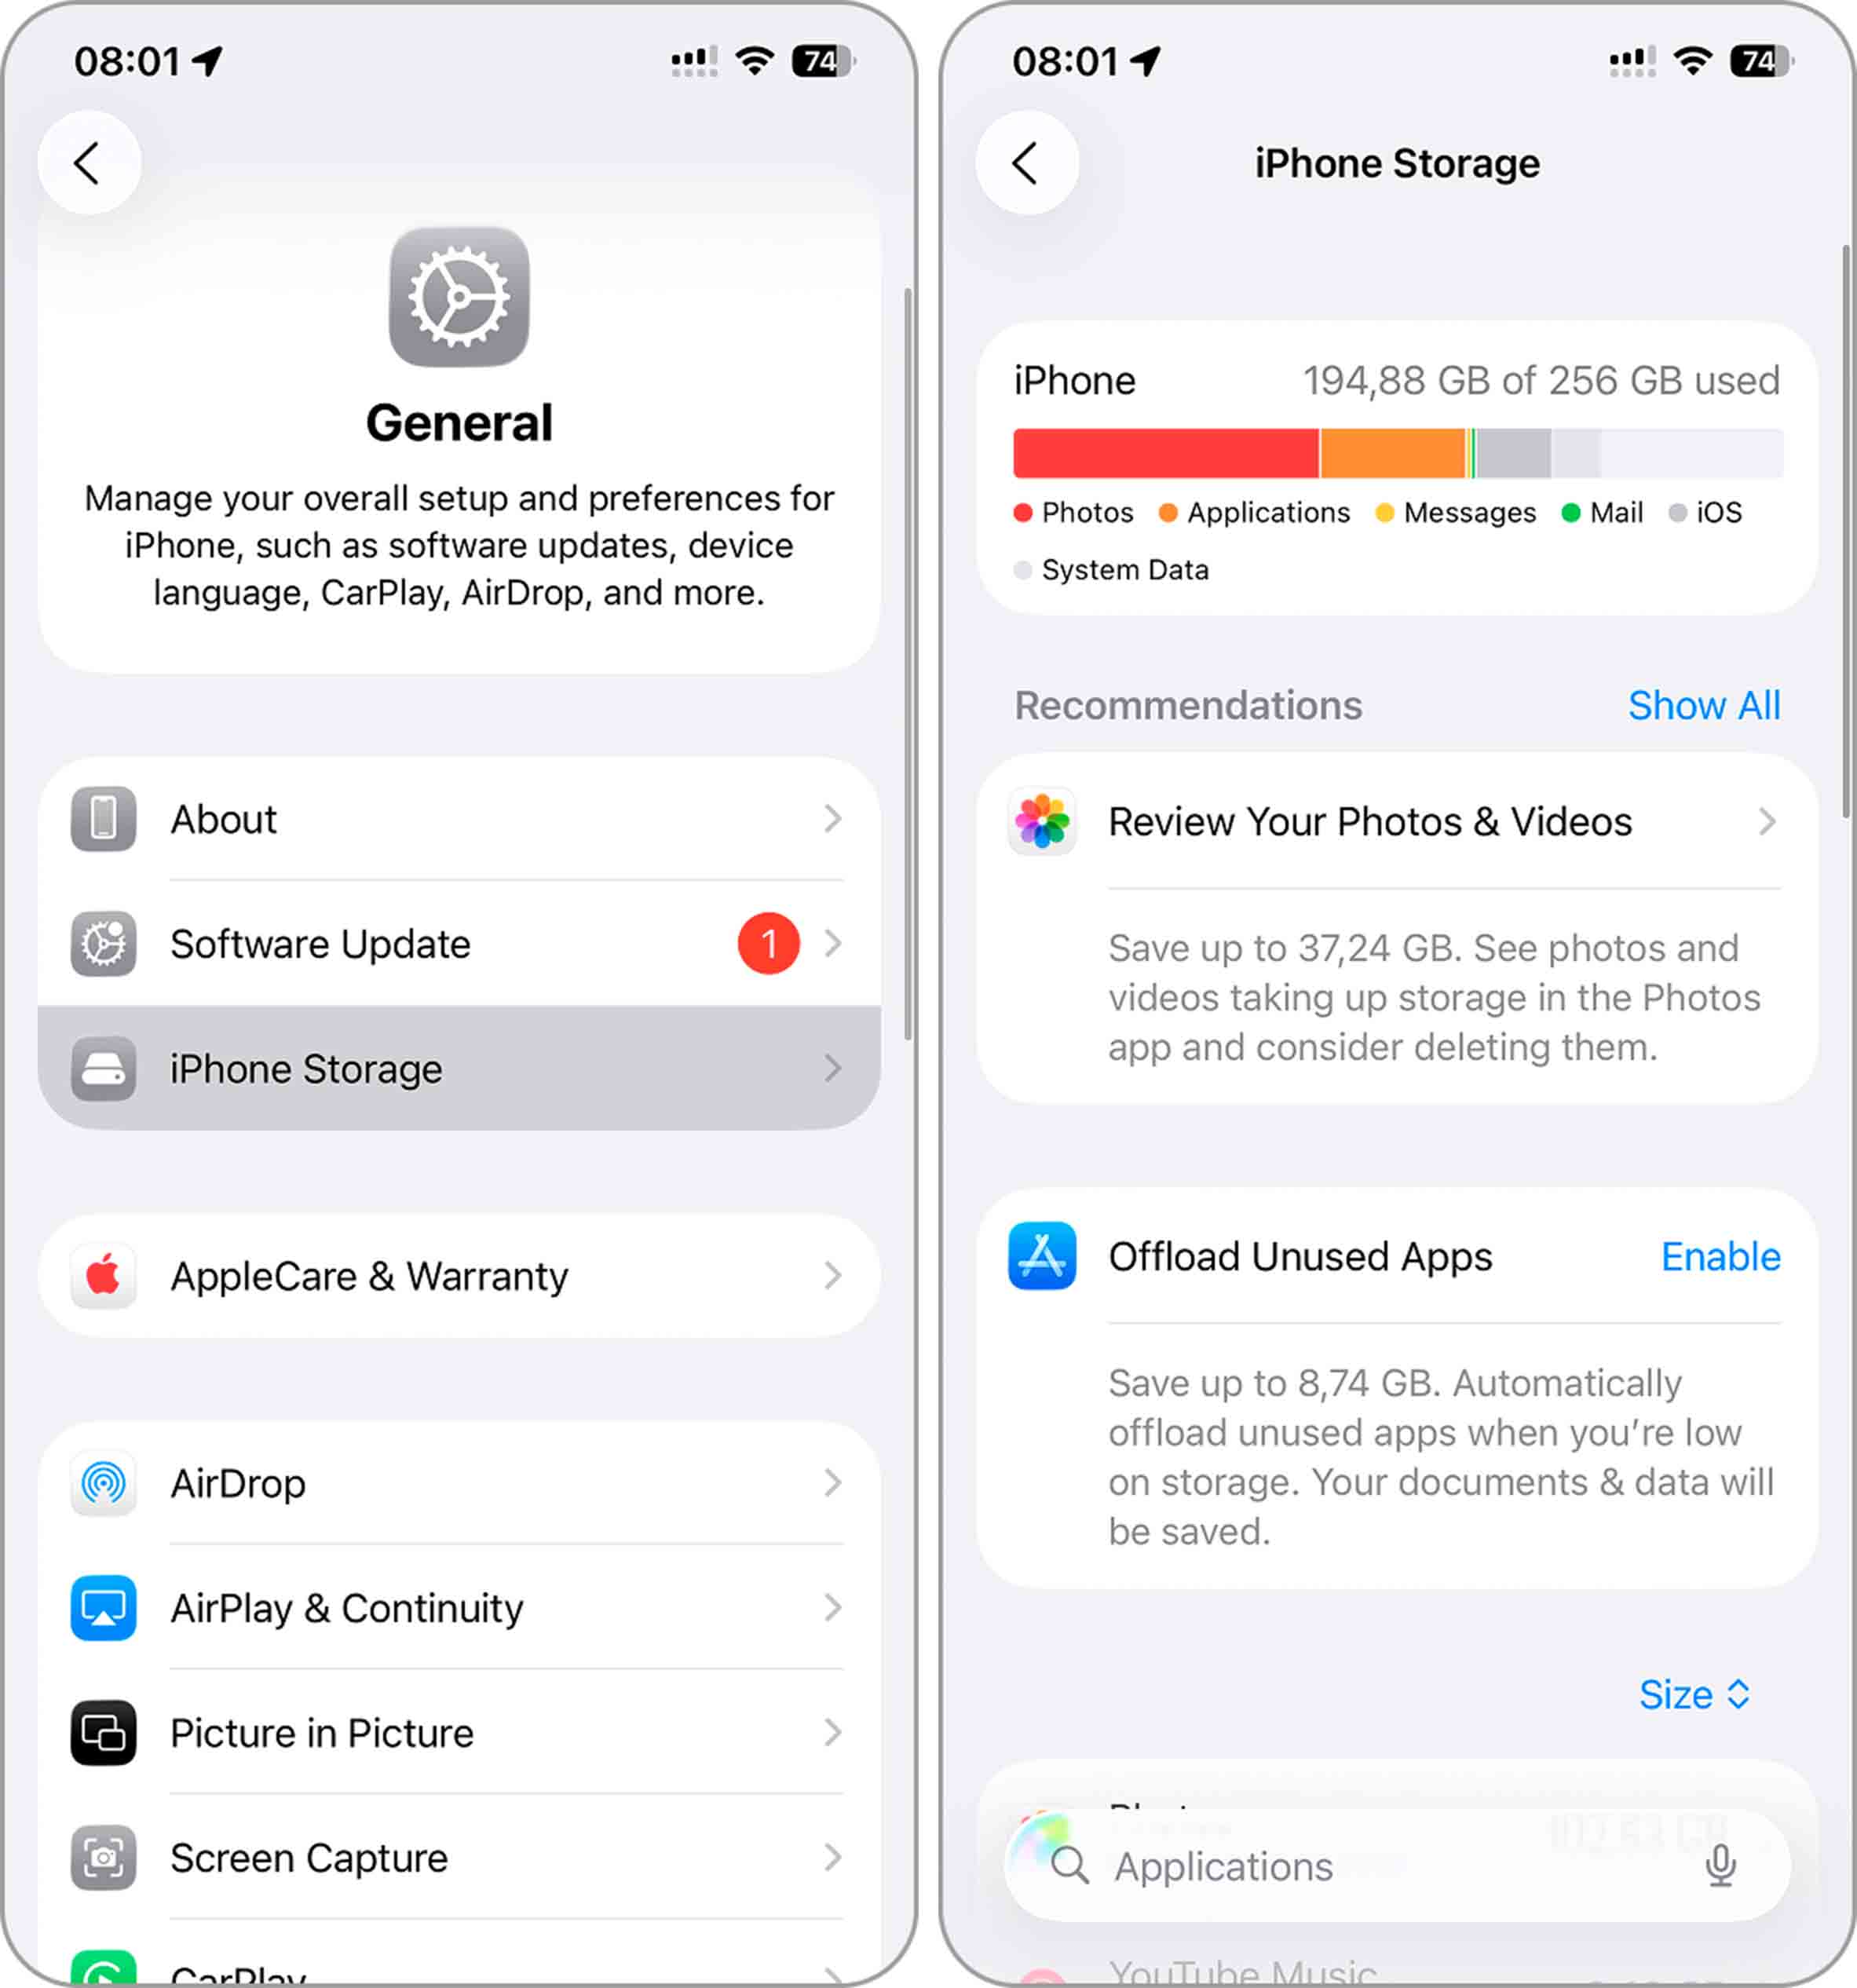
If you notice that your available storage is too small for recording, don’t wait until the dreaded notification “iPhone Storage Full” pops up in the middle of filming. Free up space before you hit record. Start with the obvious: delete apps you never touch, clear out the Photos app, and remove large video files that no longer matter. Even a quick round of housekeeping like this can give your iPhone enough breathing room to handle long sessions.
If the free space on your iPhone already looks tight, don’t wait for the “Storage Full” message to ruin a recording. Clear some room before you press record. Unused apps you’ll have to remove by hand, but the Photos app can be cleaned up automatically. That’s where a tool like Clever Cleaner helps — it spots duplicates, screenshots, Live Photos, and also surfaces large videos on iPhone, then lets you wipe them in a few taps. Afterward, check iPhone Storage again and keep a safety margin of at least 15–20 GB for long sessions.

Step 2. Charge Your iPhone to the Maximum
Recording video drains battery faster than almost anything else you can do on an iPhone. A single long session in high resolution can eat through a full charge well before you finish. That’s why it makes sense to start with your phone at 100%.
🔋Even with 100%, don’t rely only on the battery. If you’re indoors, keep the charger plugged in. If you’re outside, a power bank is your safety net.
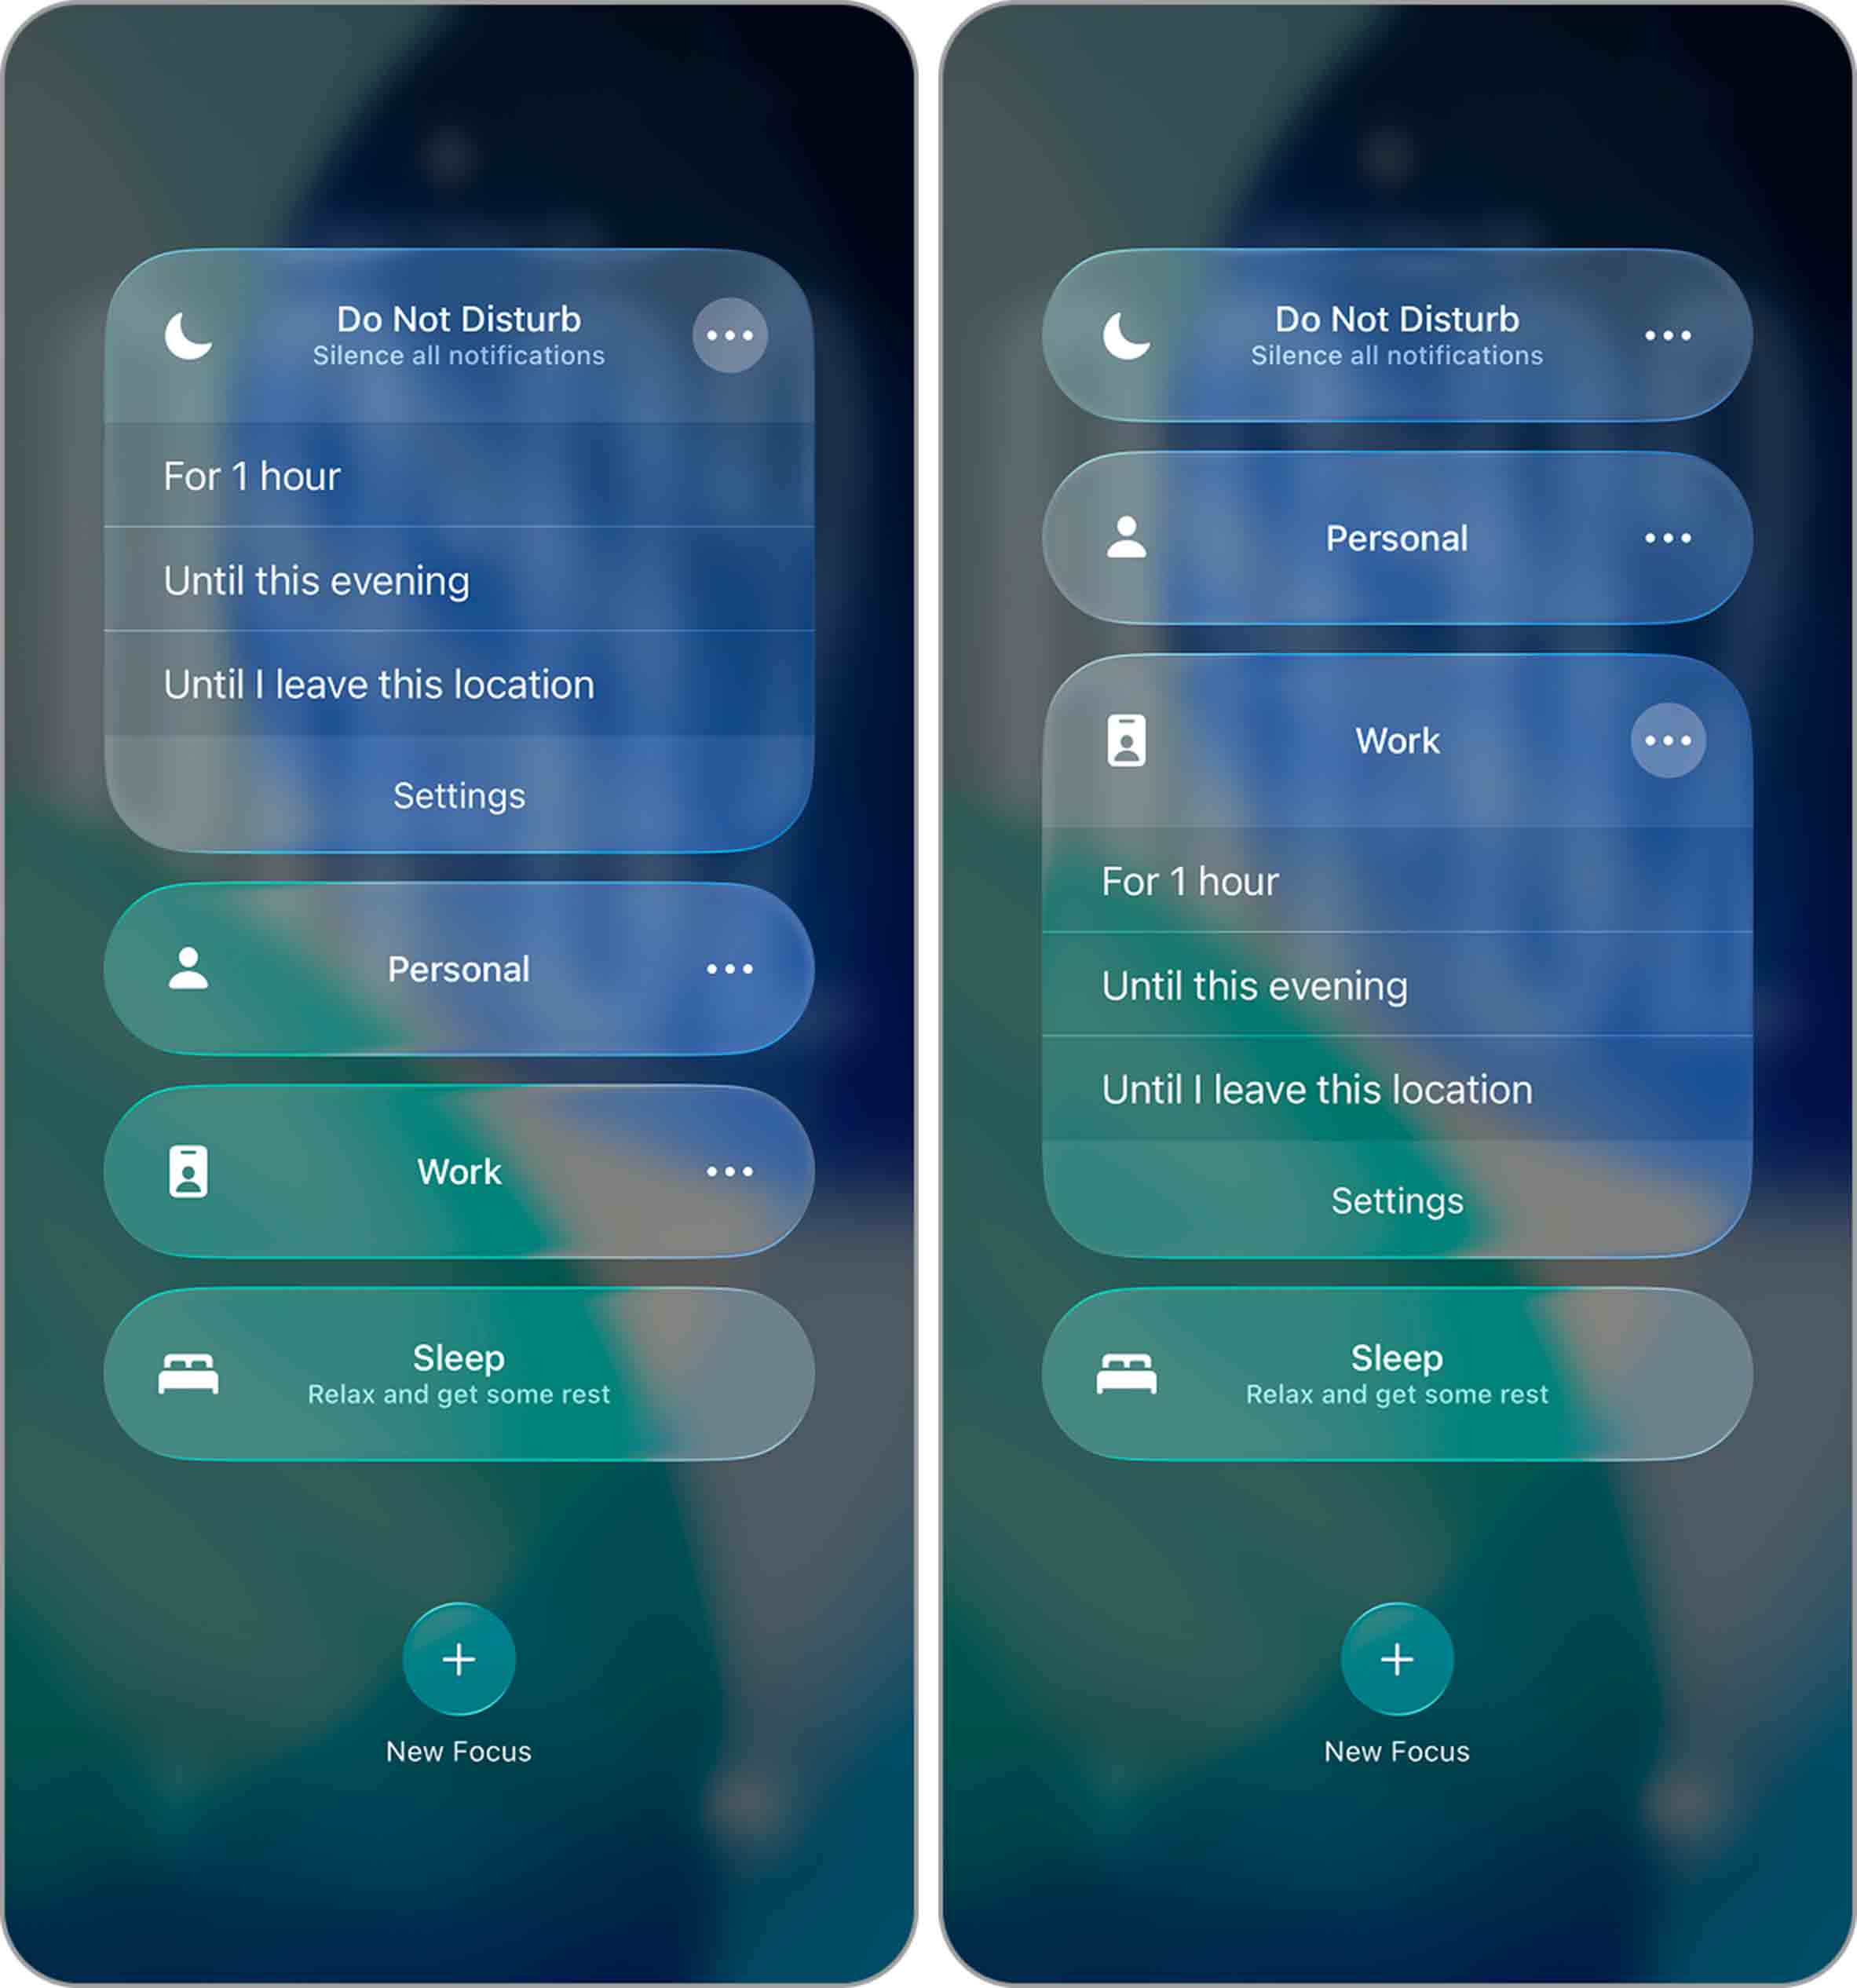
Step 3. Block Out Notifications
Something that often slips through the cracks is notifications. A call from a friend, a random app alert, or even a system pop-up is all it takes to ruin a recording. Imagine getting halfway through a long clip only to have it spoiled by a Messenger ping or a calendar reminder sliding across the screen.
The fix is simple — switch your iPhone to Do Not Disturb or Focus mode. That way, calls and alerts stay silent until you’re finished.
How to Record Videos for Live Stream on iPhone
When you start building hours of material for your 24/7 stream, the way you shoot matters just as much as the amount of storage you have. A few small adjustments can save you from poor-quality clips and make your content library watchable for the long run.
- 📱 Start with the camera. The rear lens will give you a sharper picture, while the front one is easier for podcasts or reaction videos. If you’re on the iPhone 17, you also get a dual-recording option, which means you can capture yourself and the scene in front of you at the same time. That feature alone can save you an extra setup if you want both perspectives in one take. And if your stream involves tutorials or gameplay, don’t forget the built-in Screen Recording tool (it’s a simple way to create useful clips without extra gear).
- 🎤 Sound is the next thing to get right. People will sit through an average video, but noisy or muffled audio makes them click away. An external mic is the best fix, though even recording in a quiet room with the phone close to you can make a huge difference.
- 💡 Lighting comes next. Daylight usually does the job if you’re near a window. At night, a ring light or even a lamp aimed at a wall can soften the shadows. The goal isn’t studio-level production — it’s clear, balanced light that keeps the picture from turning grainy.
- ⏱️ Don’t try to record a six-hour block in one file. Break it into sessions of an hour or so. The phone runs cooler, the files stay manageable, and you get natural breaks to reset your setup if needed.
- 🎬 Keep the background, light, and audio levels consistent from one take to the next to make the finished library flow smoothly when you string it together for streaming.
Shot All Your Stream Clips on iPhone? Time to Organize Them
Once you’ve finished recording content on your iPhone, the next step is to unload everything. iPhones aren’t designed to hold hundreds of hours of footage, so transfer your files to a Mac or Windows PC. From there, you can use a service that handles the heavy lifting — in this case, LiveReacting.
In this tutorial, we’ll use LiveReacting to show how to turn your pre-recorded videos into a nonstop stream without extra software. You can even customize the look of your stream so it feels unique and doesn’t look like anyone else’s.
- Move your clips from iPhone to your computer using whatever is most convenient — a Lightning/USB-C cable, AirDrop (if you’re on a Mac), or cloud storage like iCloud or Google Drive. Once the videos are on your computer, you’re ready for LiveReacting.
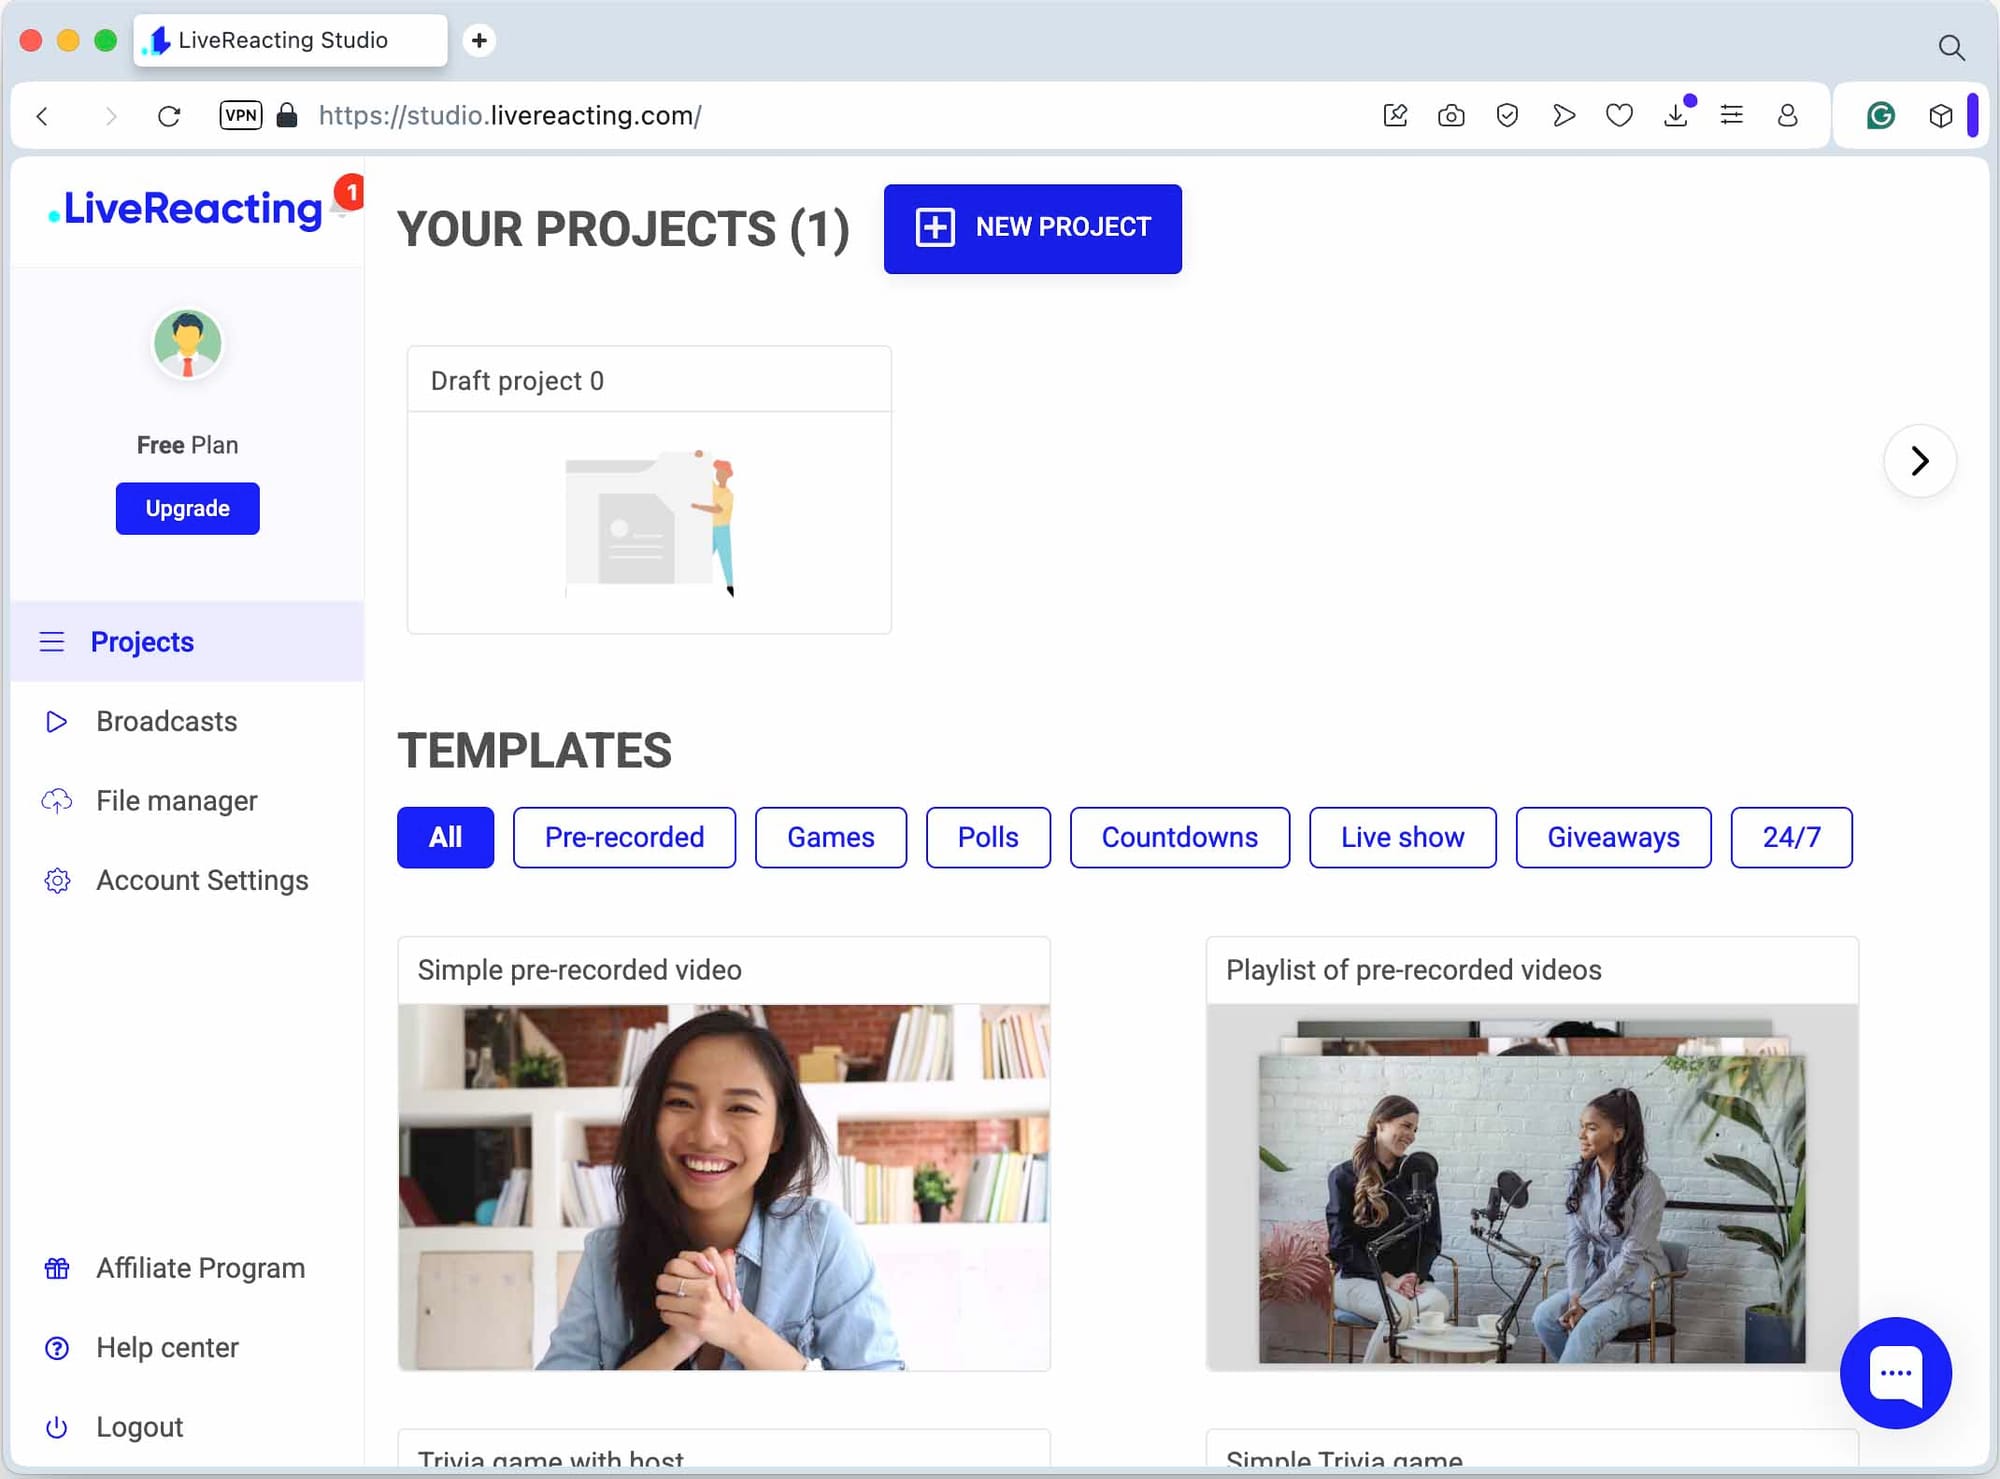
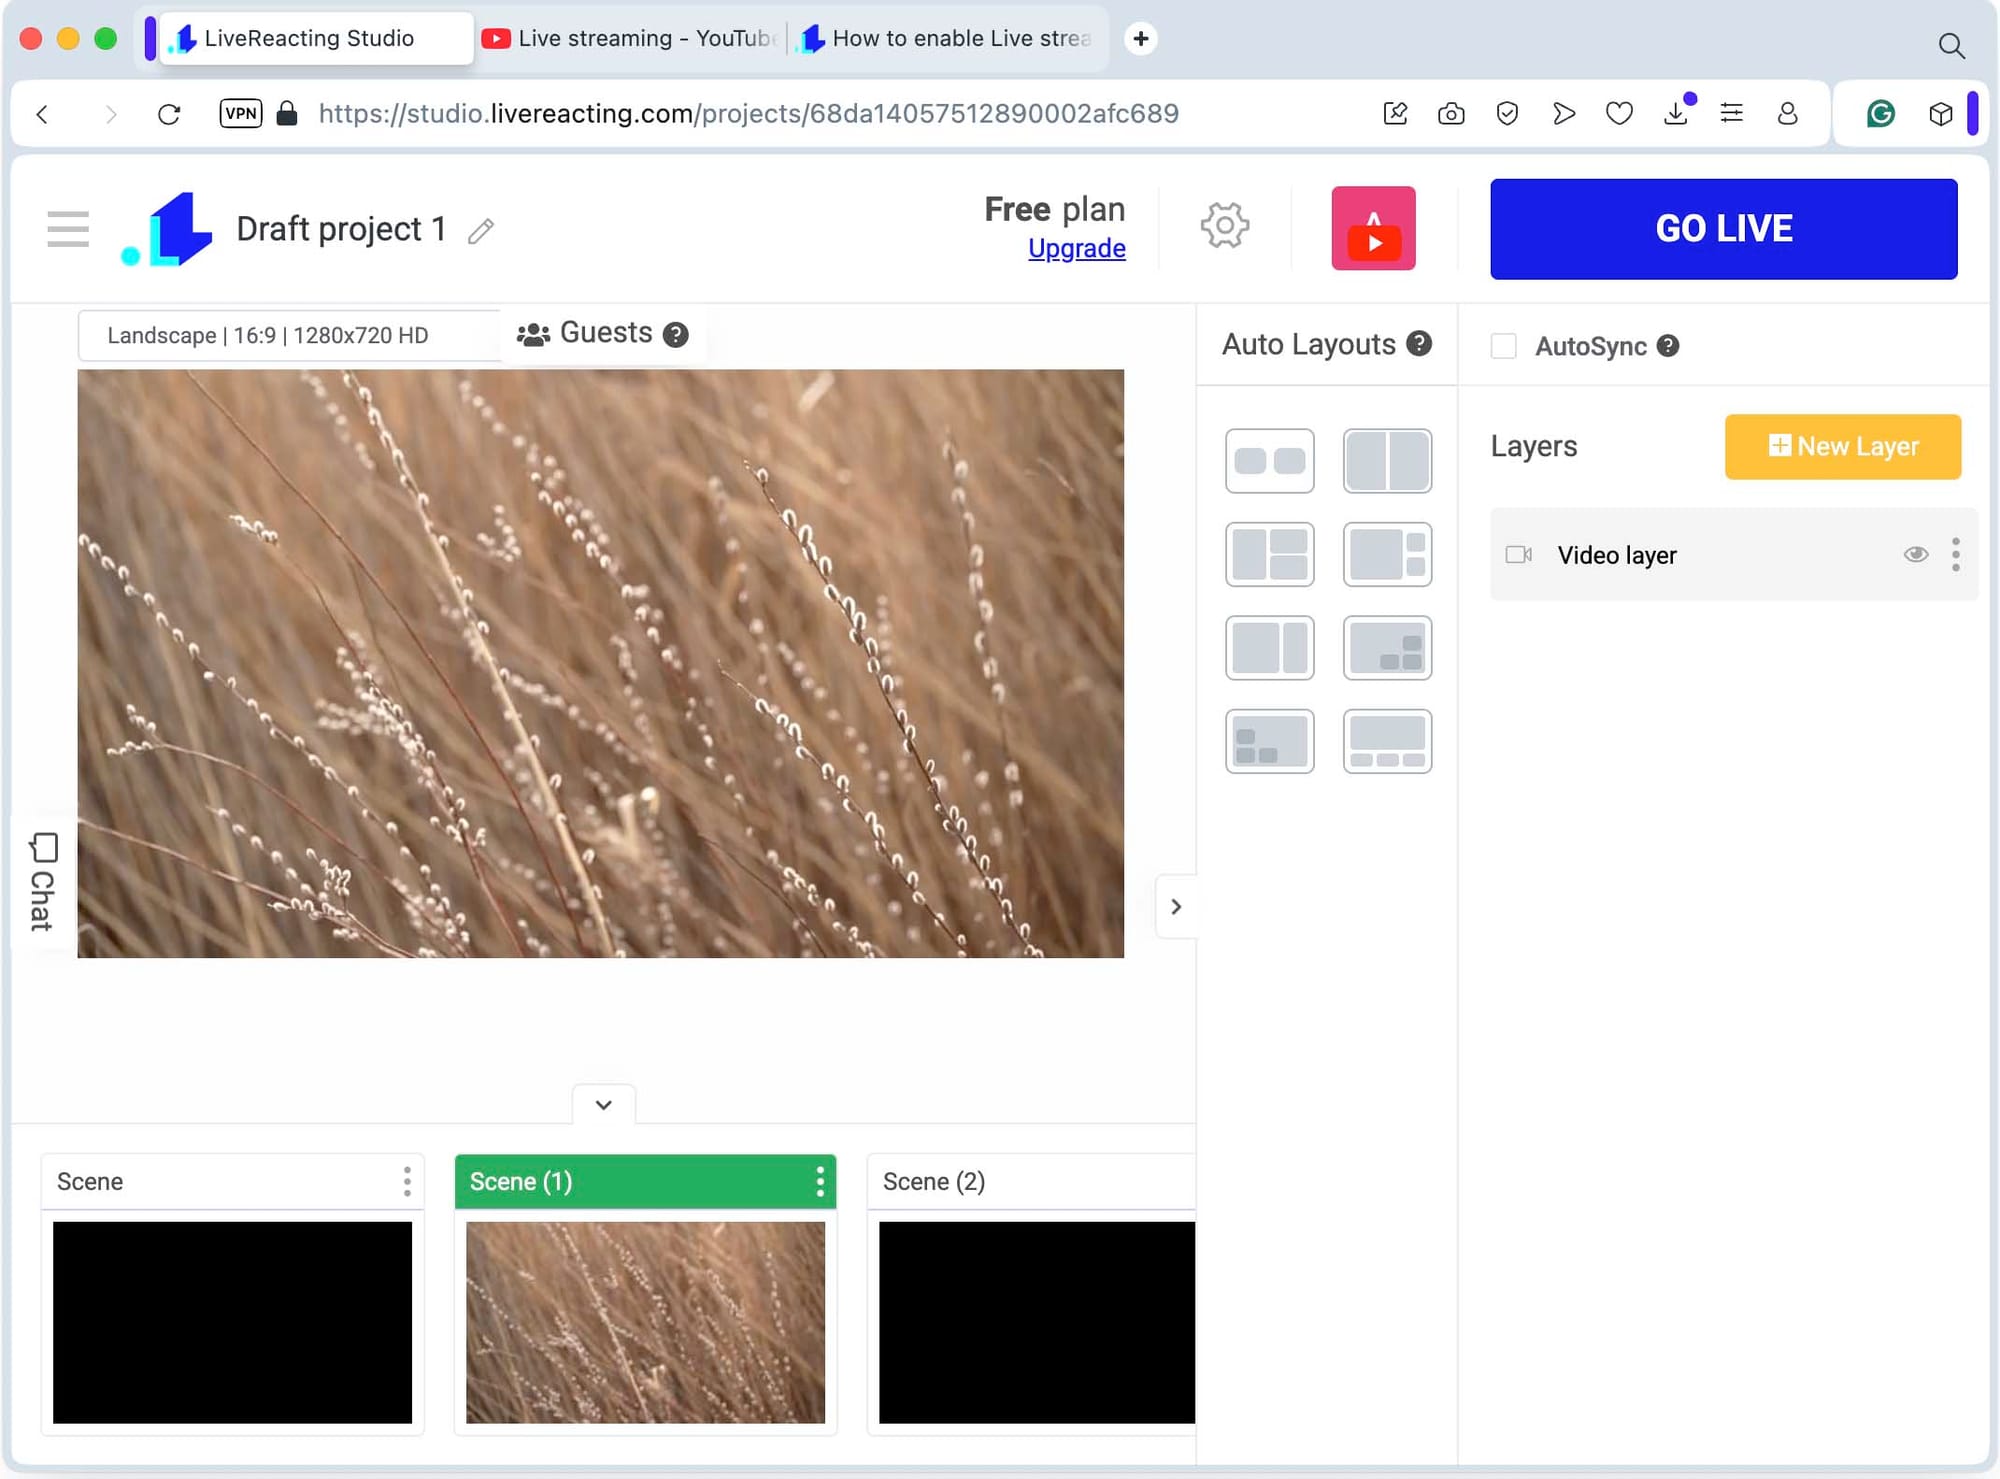
- Log in to your LiveReacting account and create a New Project.
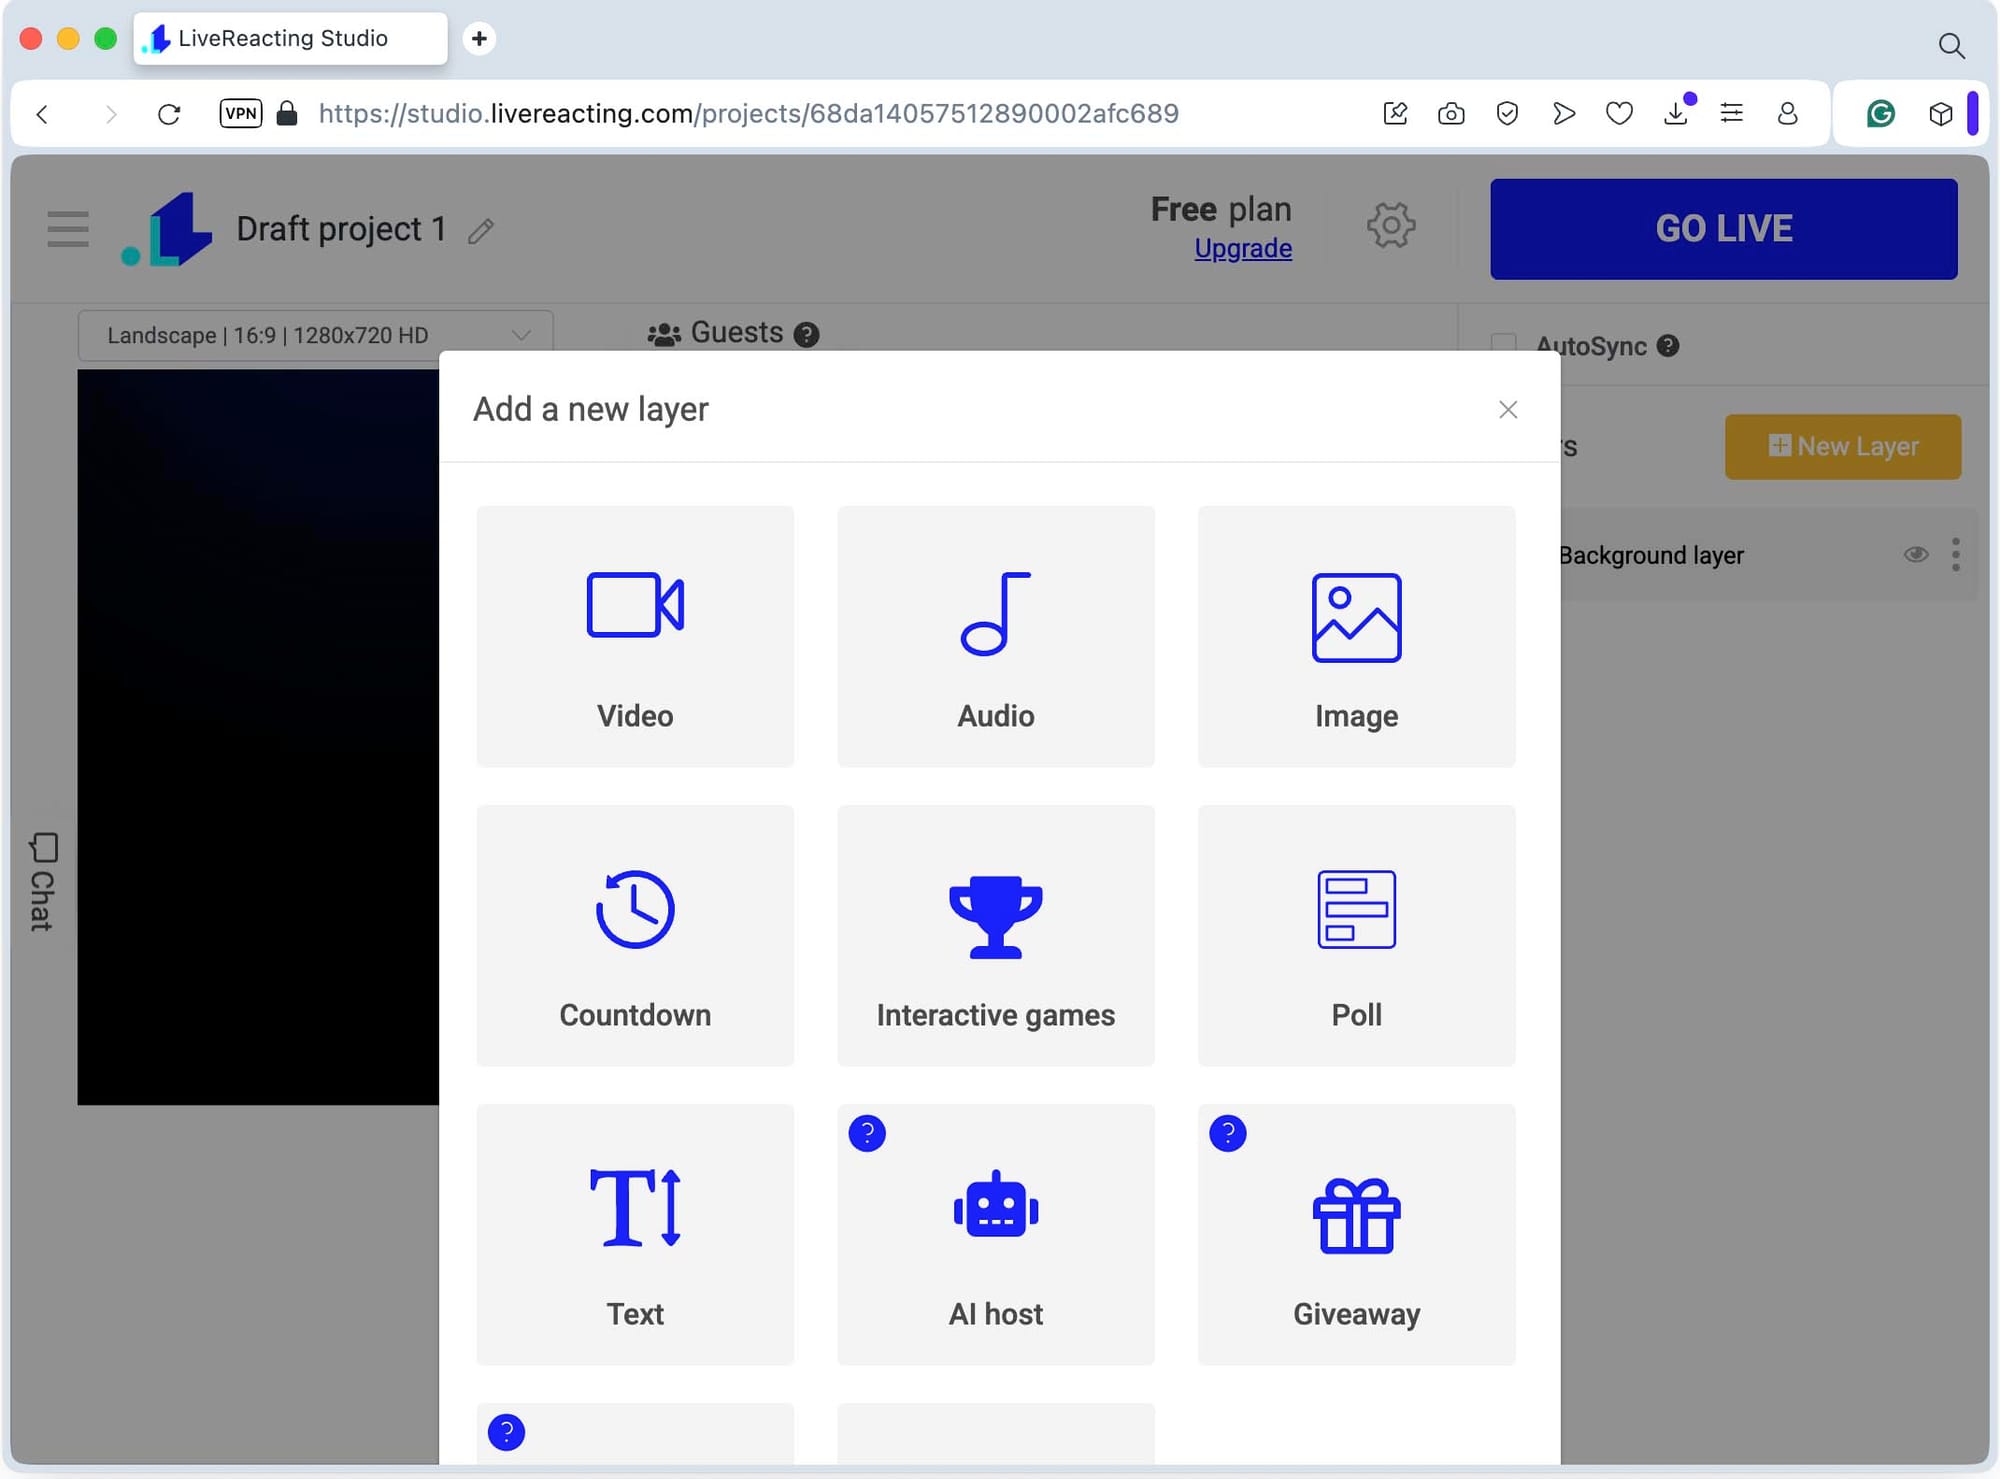
- Inside your project, add a new layer. Choose Video > Video Playlist. This is where you’ll build the sequence that runs during your stream.
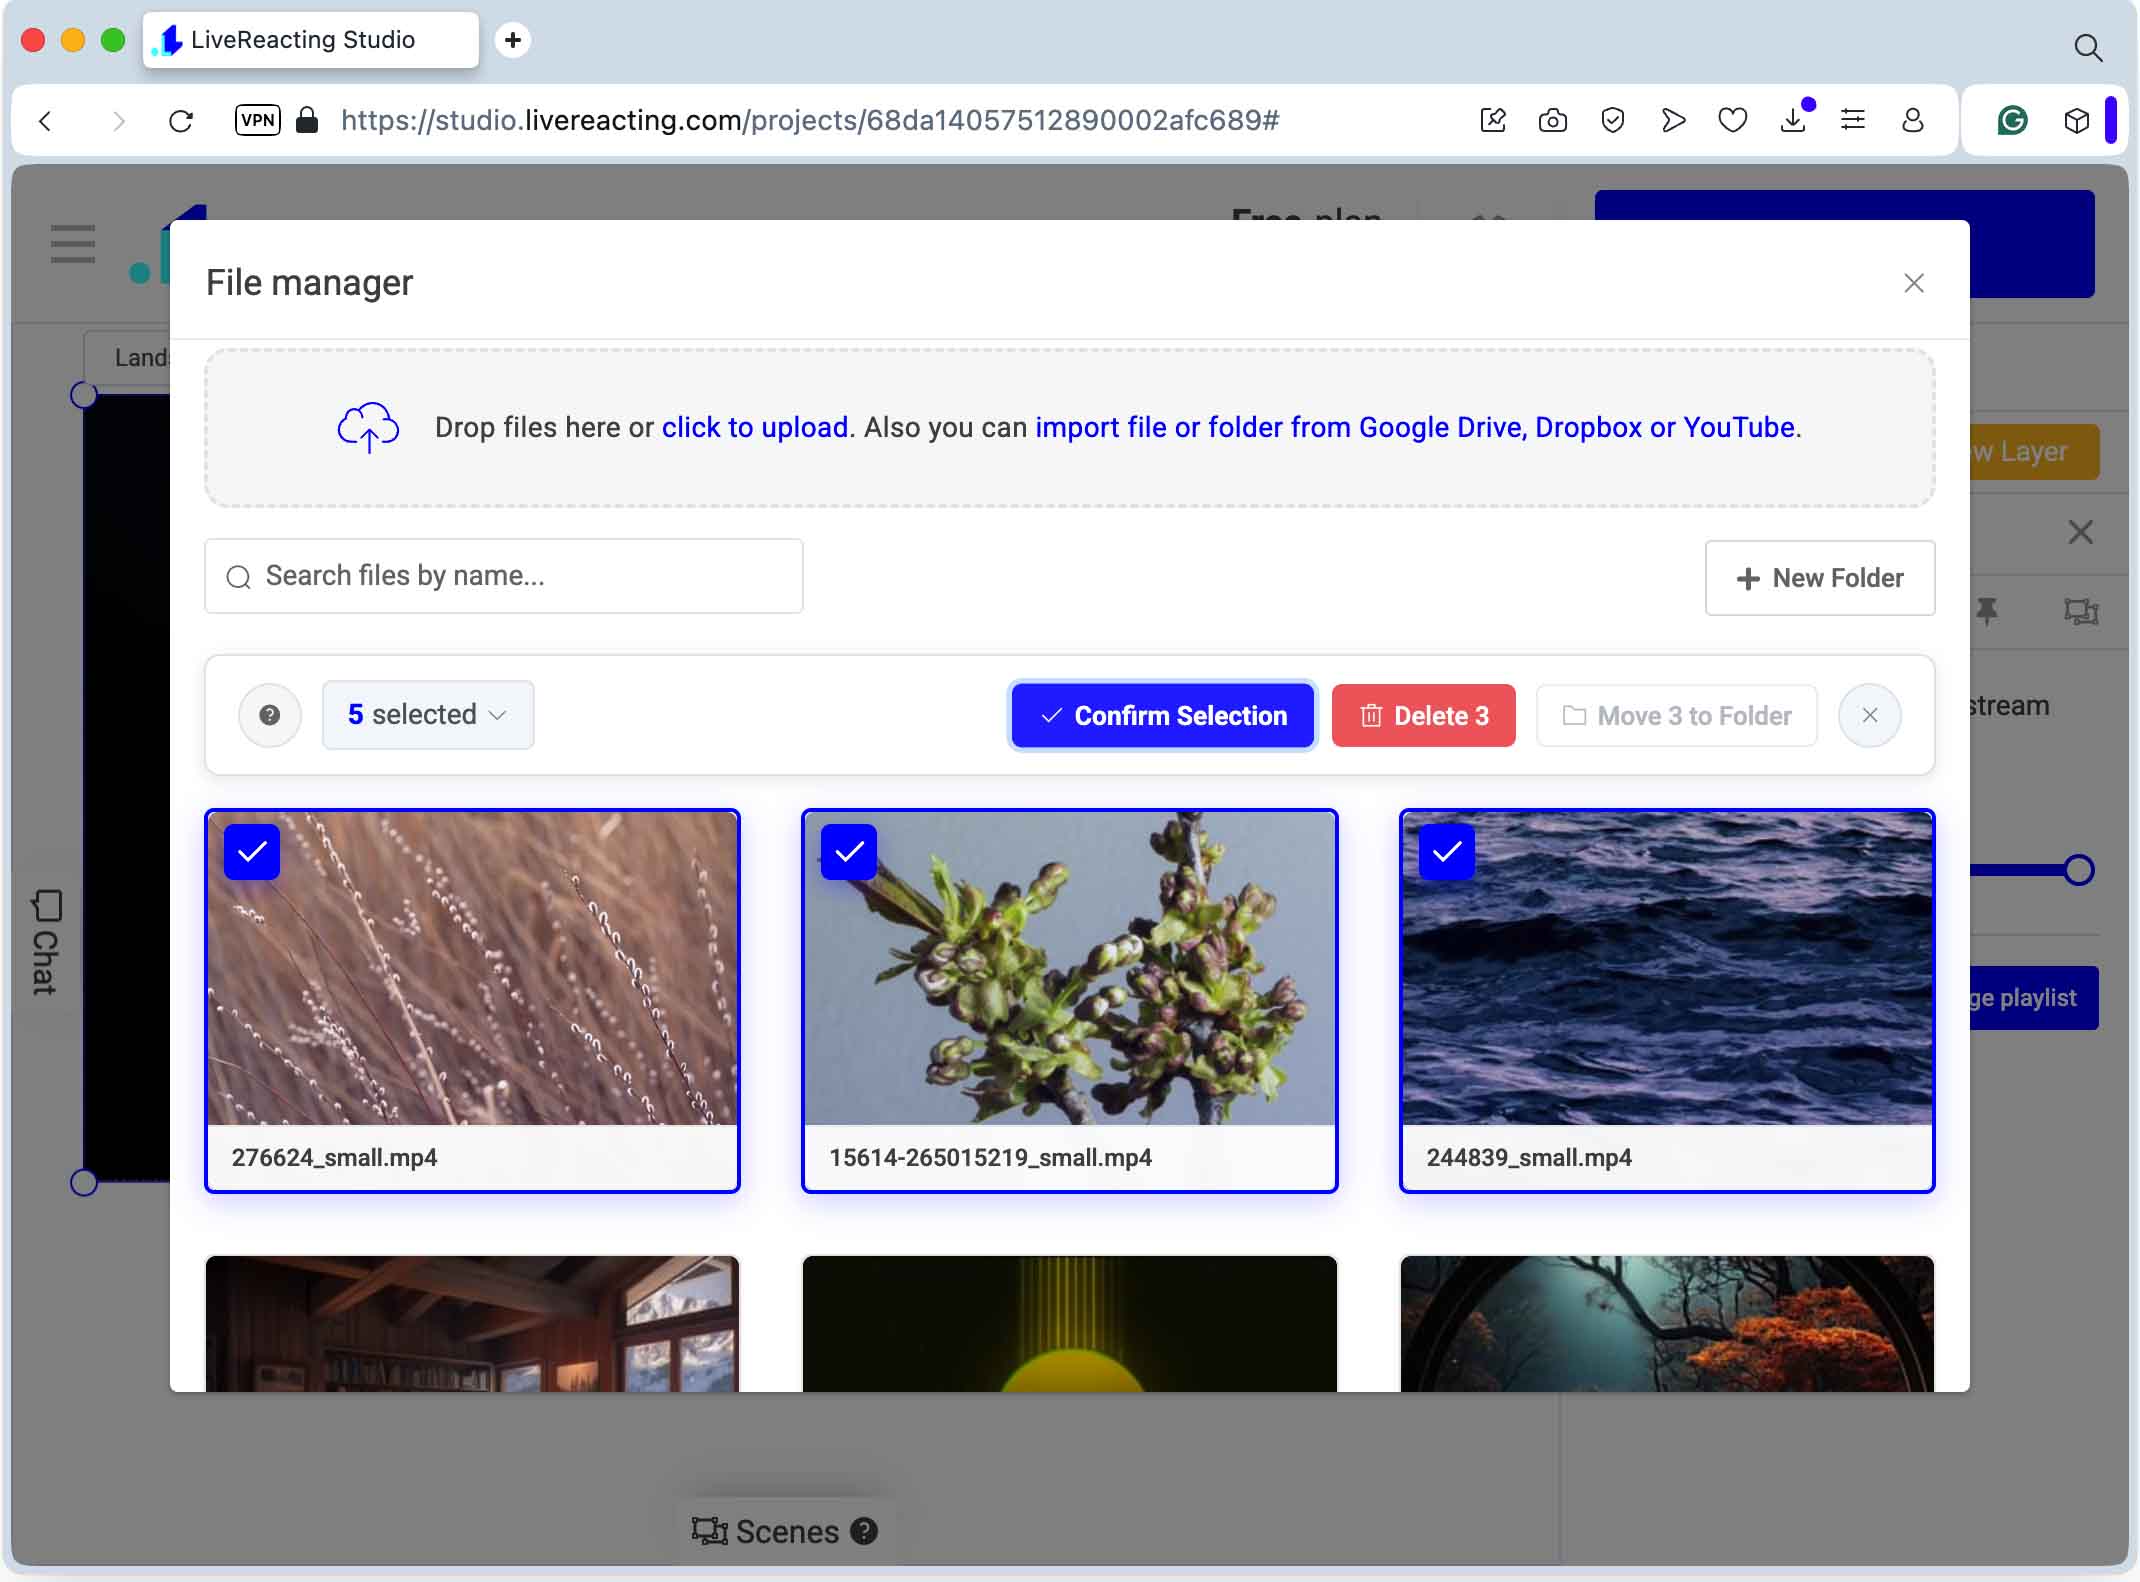
- You can add everything in bulk — just select the files on your computer and upload them in one go. This saves you from dragging in each clip one at a time.
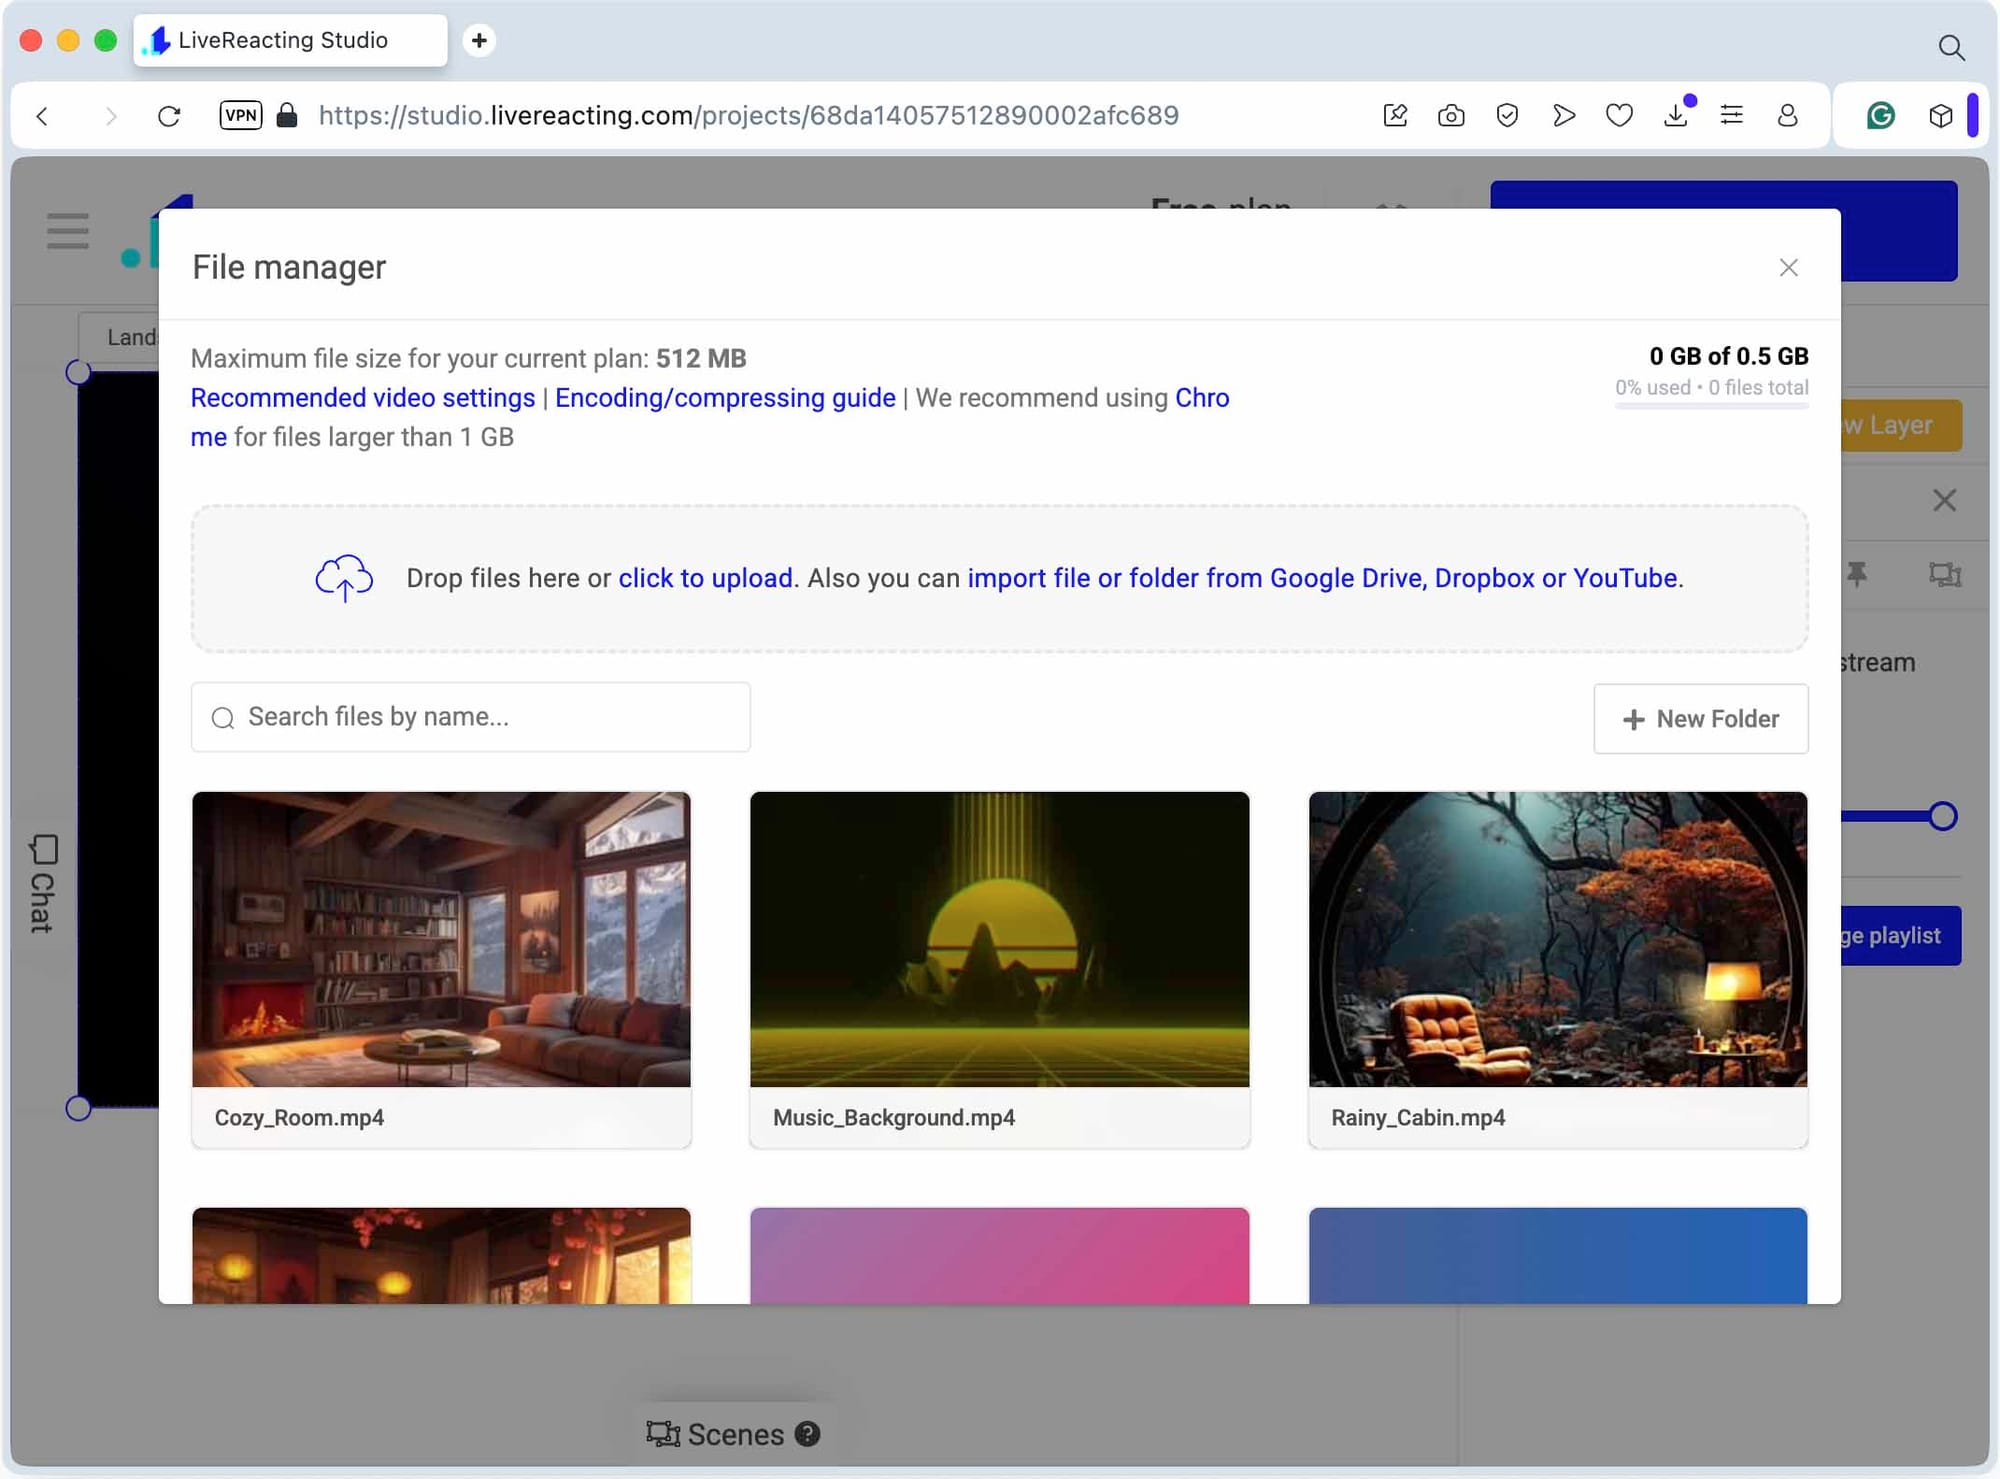
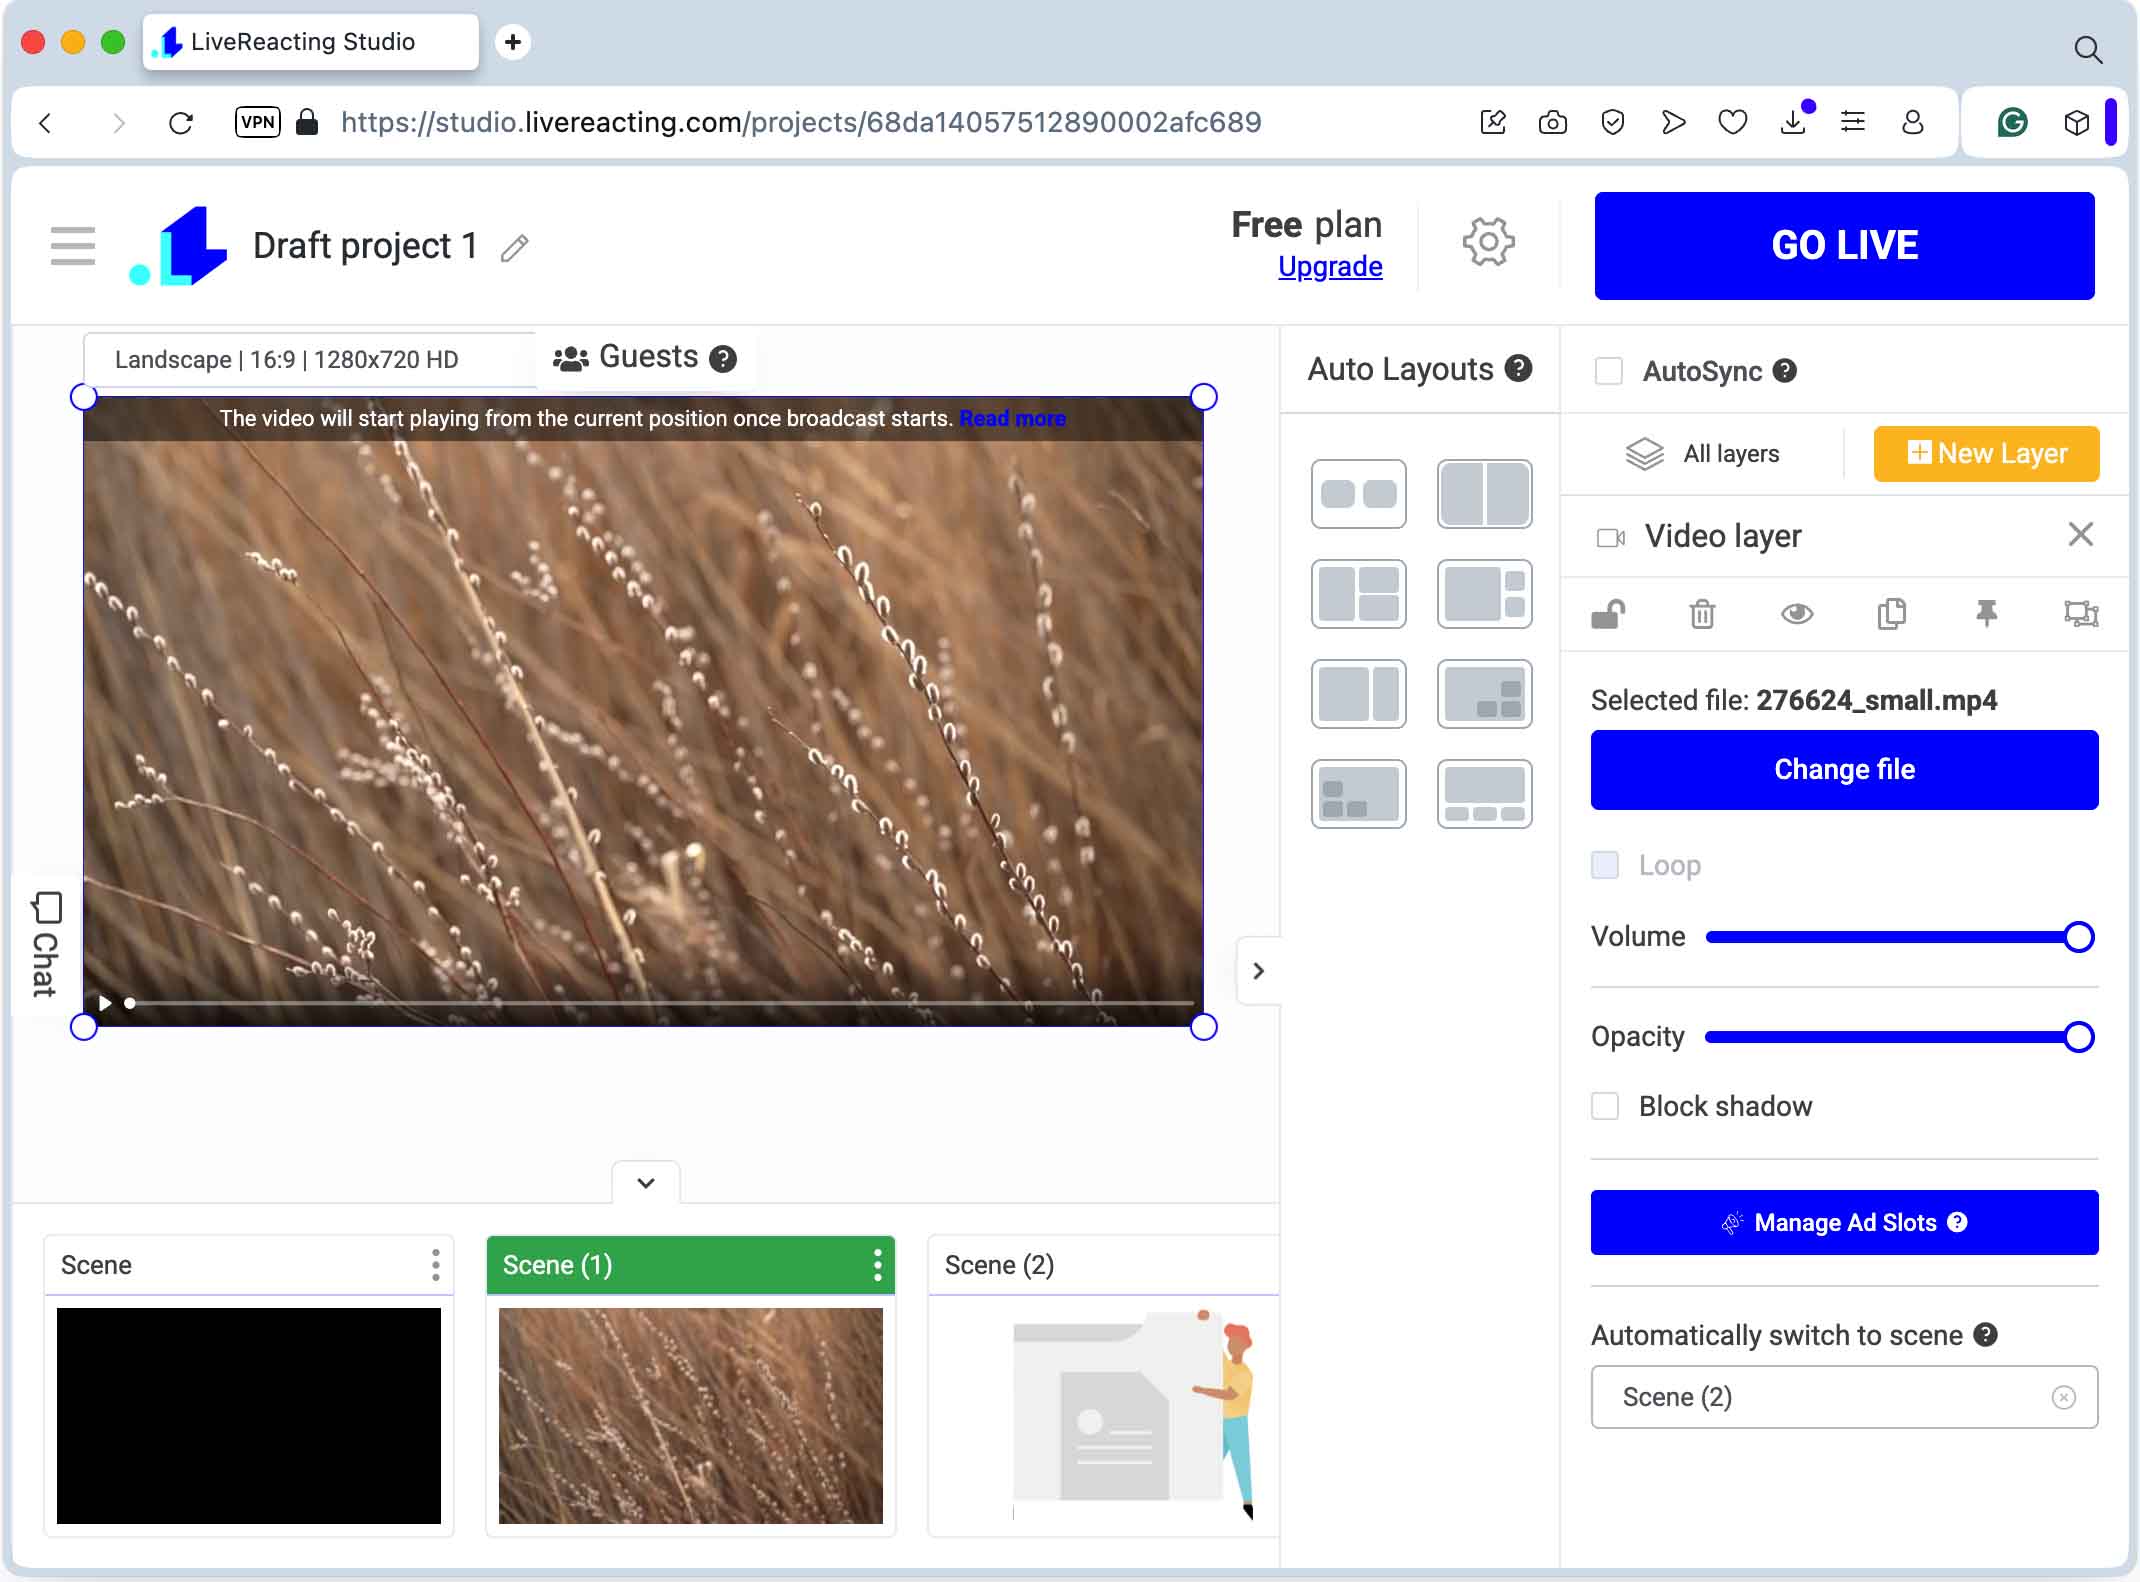
- Once uploaded, select the clips you want included in your stream and confirm your choice. Your playlist will appear in the sidebar, ready for you to adjust the order or make quick edits.
- If you’re using more than one scene in your project, you can tell LiveReacting to move from one video to another automatically. Add your scenes first, then go back to the playlist settings and set which scene should play next.
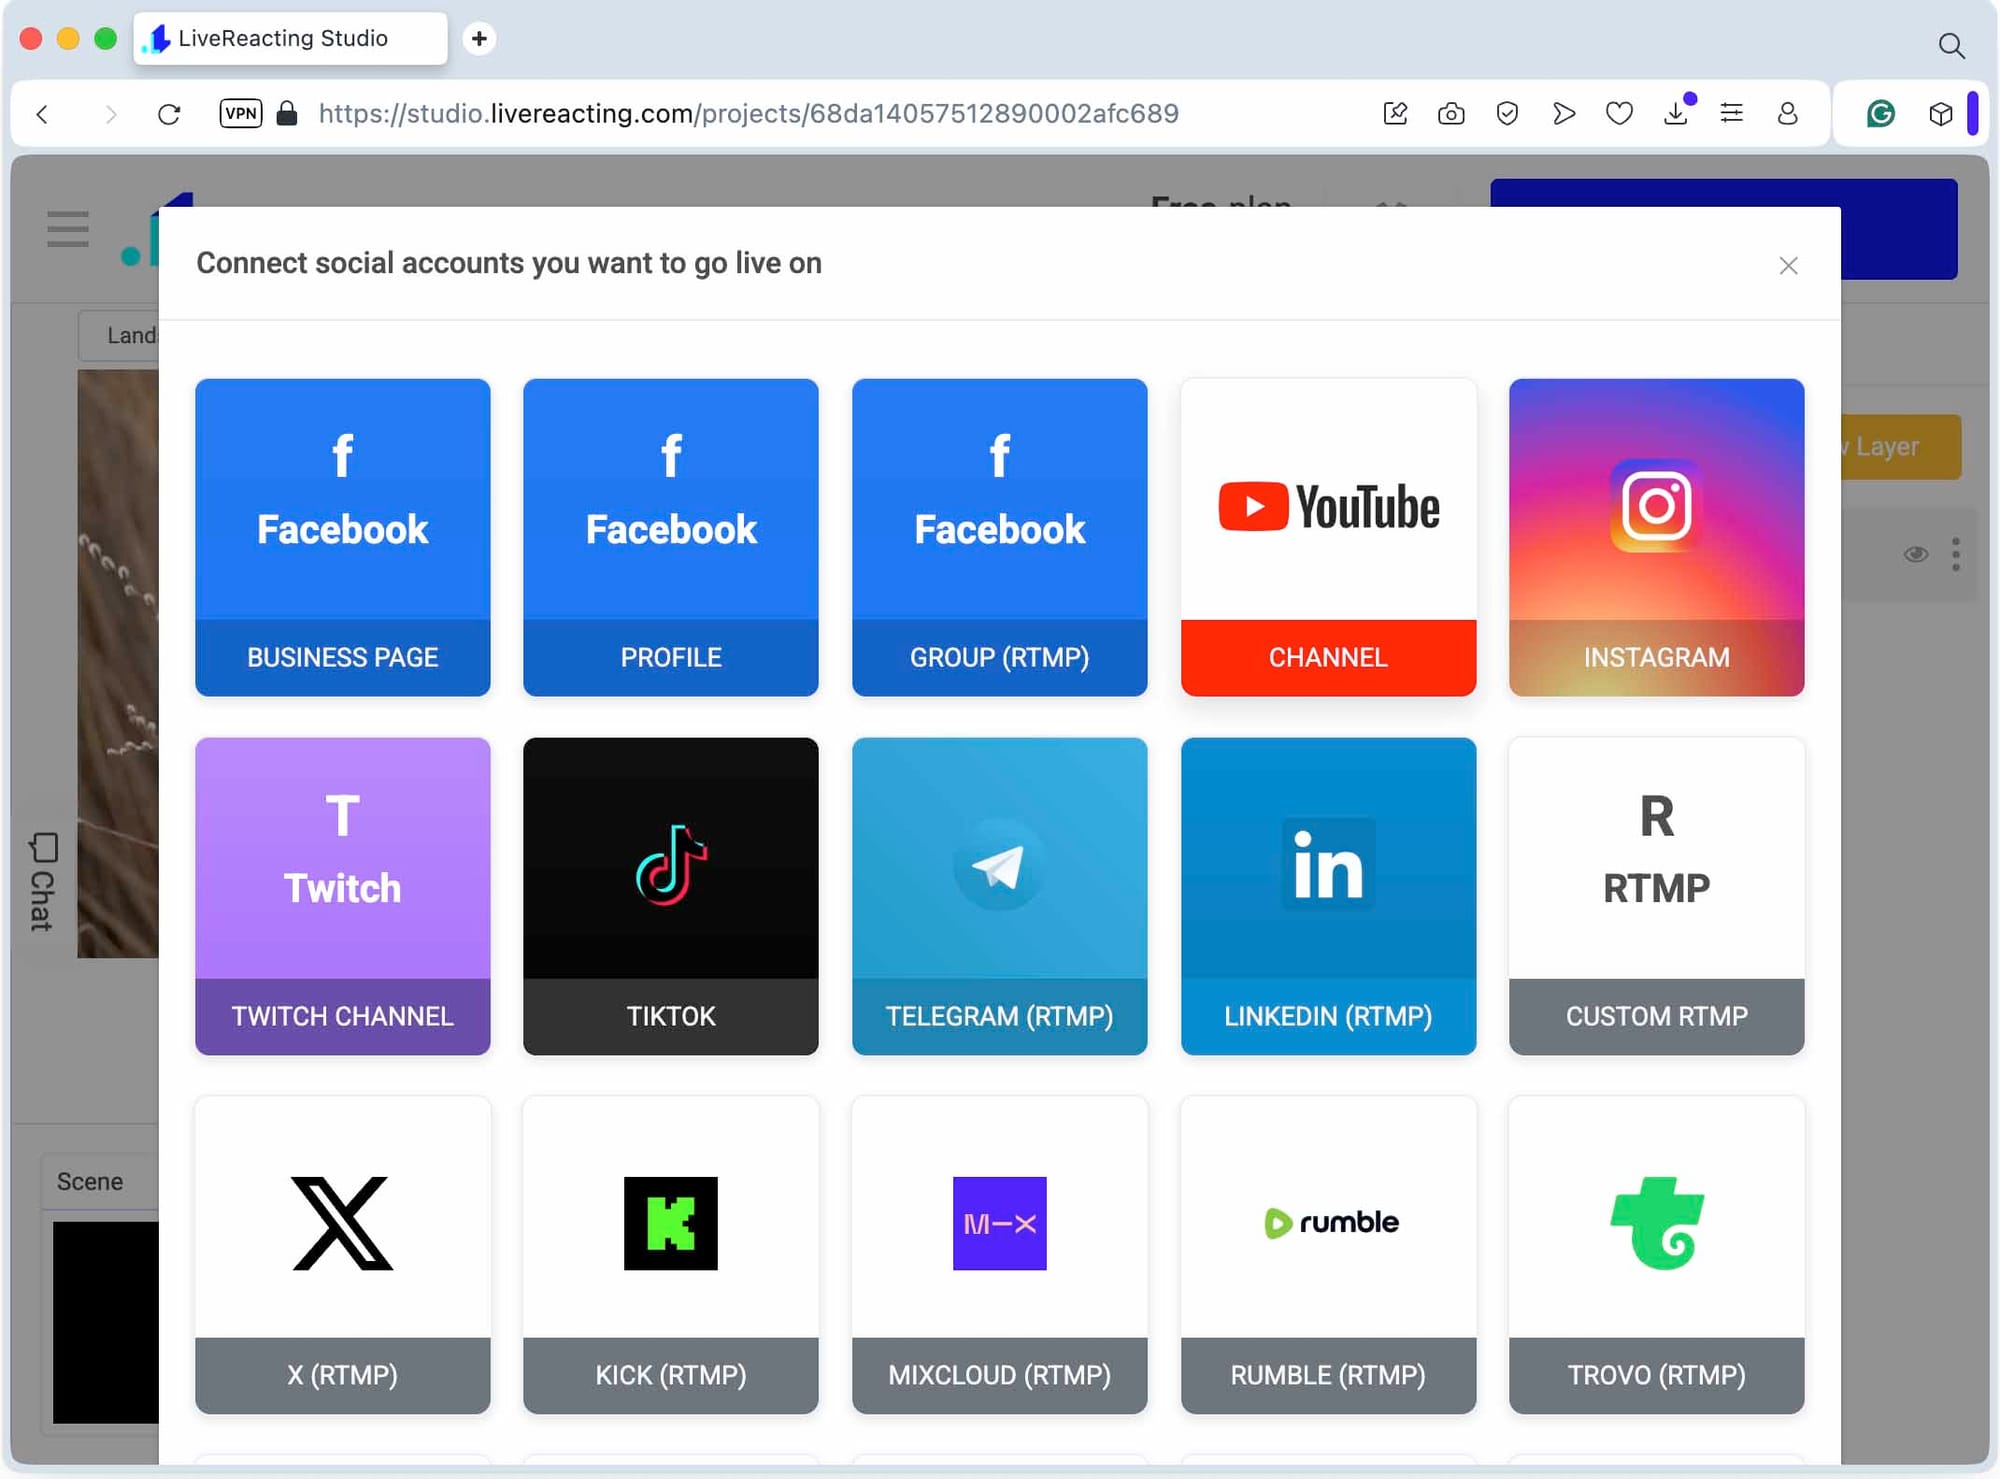
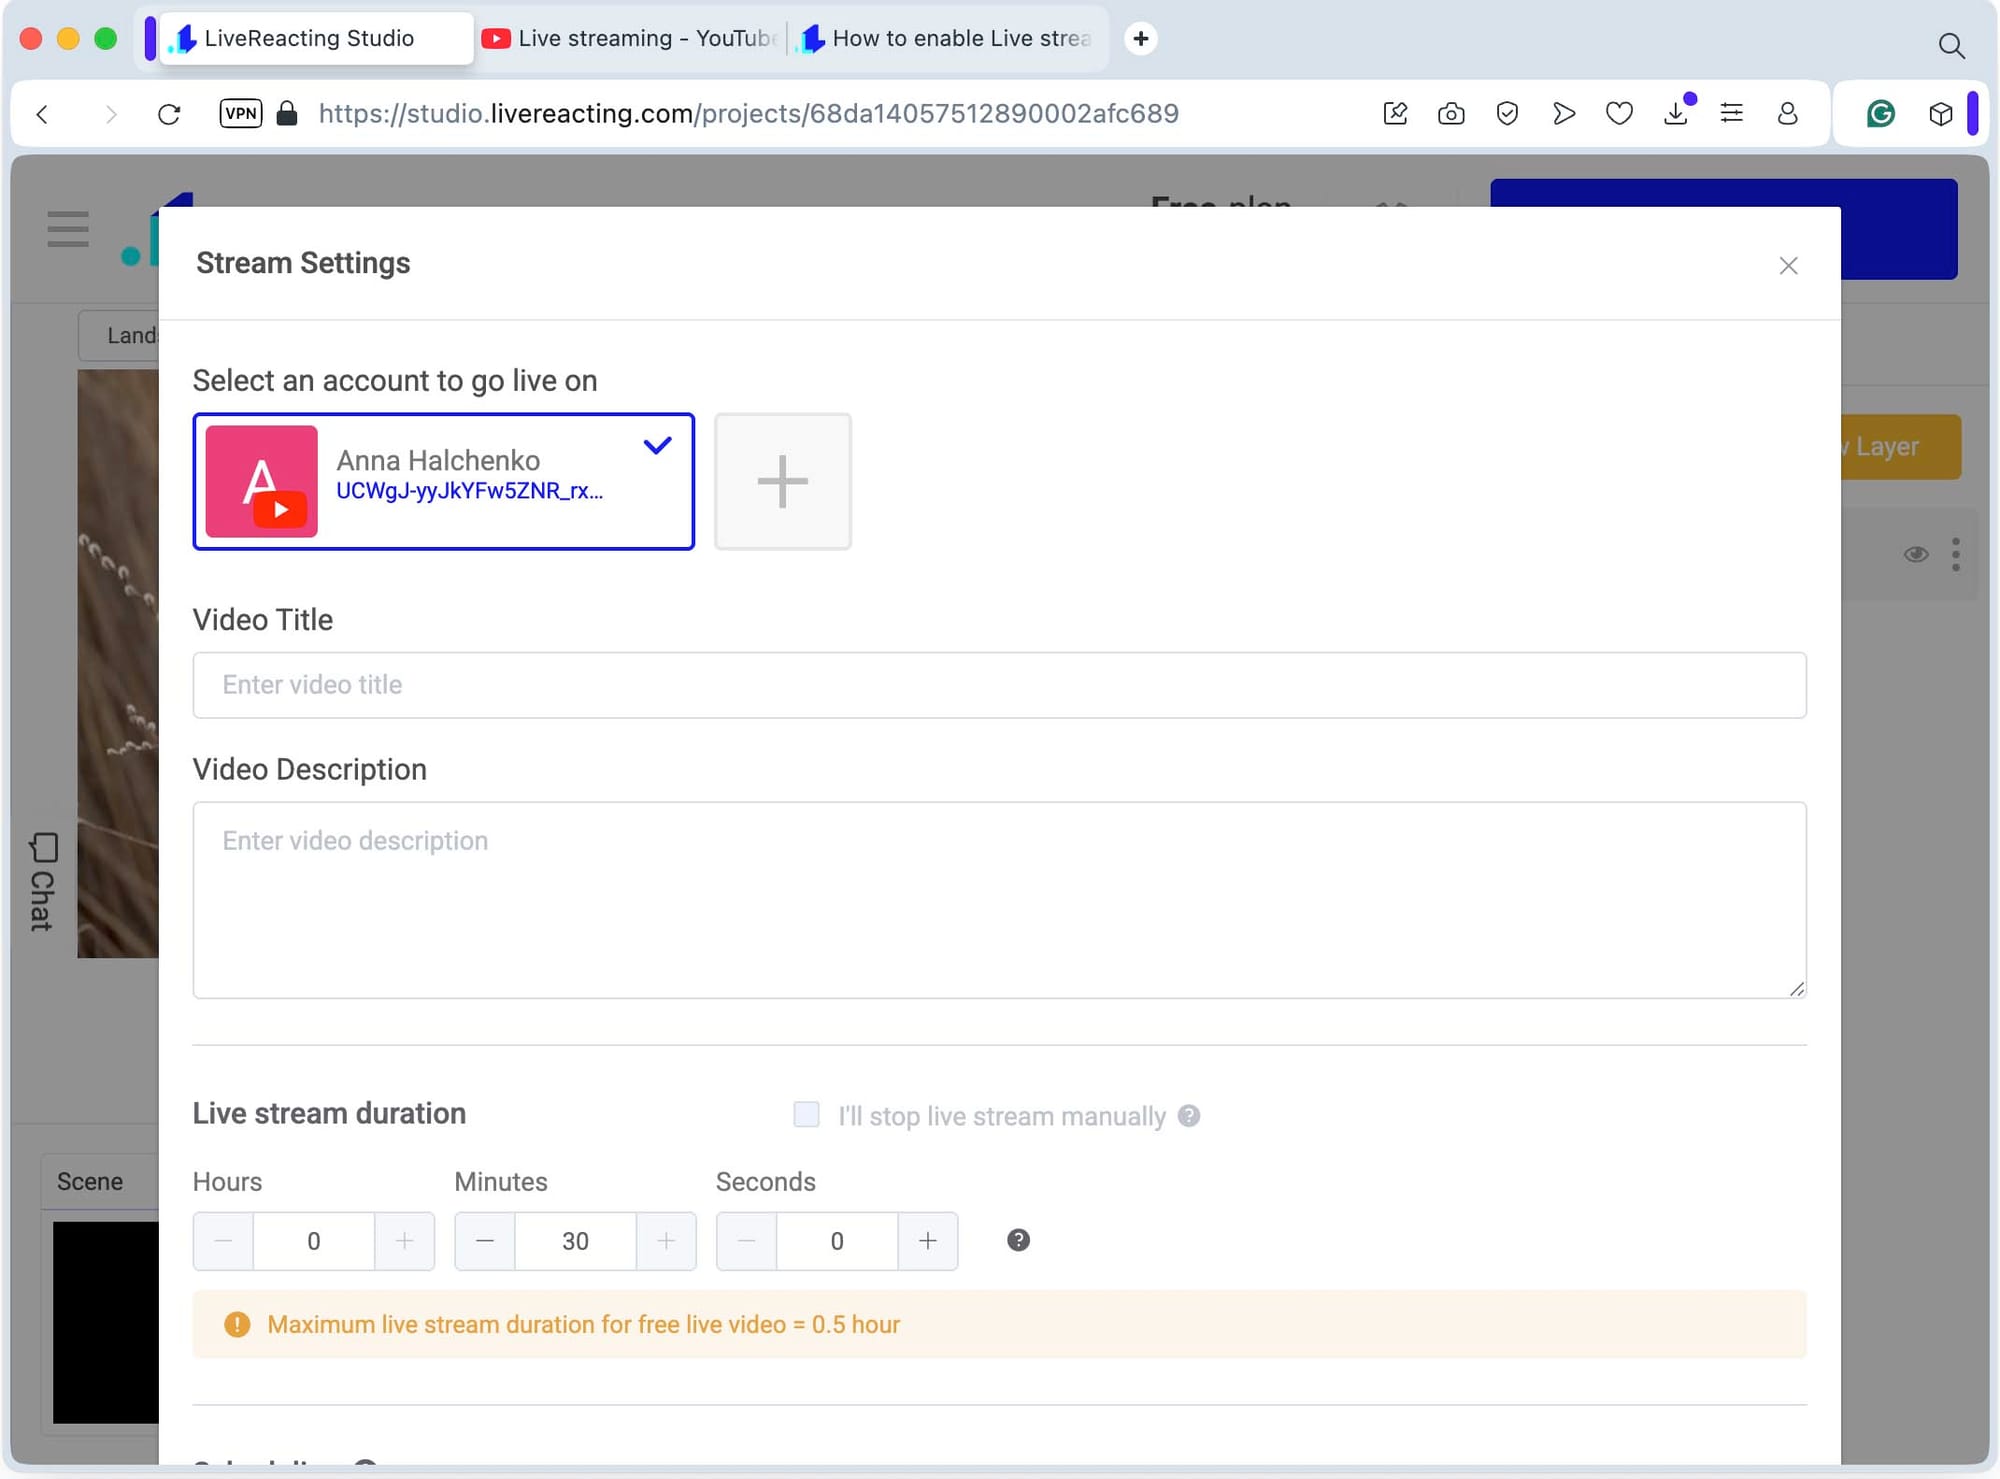
- Click the gear icon (Settings) and link your streaming account by hitting the + button. If you plan to record a YouTube live stream on iPhone and now want to stream it, choose YouTube. For other platforms, select the right one from the list.
- Fill in the title, description, and set how long you want the broadcast to last. If you’d rather schedule it, LiveReacting lets you pick a time in advance.
- Once everything is ready, save your project and hit Go Live. Within minutes, your stream will appear on the platform you connected to.
✅ After setting up the stream, return to your iPhone and clear out the old recordings to make space for new ones (you can do it by hand, or speed things up with Clever Cleaner). While your first batch of videos is running live, start recording a new set. Once those are ready, upload them to LiveReacting and add them to your playlist. This way, your stream never stops and your library keeps growing.
Conclusion
As you can see, making a 24/7 live stream with an iPhone isn’t nearly as complicated as it might have seemed at first. If you follow the steps we’ve covered here, the process becomes straightforward. Just remember that the iPhone is a powerful tool, it’s not built to handle endless recording without a break. Record in sessions, then move everything over to your computer for organizing and streaming.
Take your time, go through this guide carefully, and start building your video library piece by piece. With consistency, you’ll get your stream running and, more importantly, you’ll grow an audience that sticks around. Good luck — now it’s your turn to hit record.
Transform Your Live Streams with LiveReacting
Join 10,000+ streamers who are boosting engagement and viewership by adding pre-recorded videos, games, polls, and countdowns to their streams.
Try LiveReacting for free today and take your streams to the next level!