
How to Create a Simulated Live Webinar?
Creating and streaming a simulated live webinar is easier than you think, and it’s a great way to mix the efficiency of a recorded presentation with the excitement of a live event. This is a super easy guide on using a software to pull this off in minutes. We’ll walk you through everything you need to know to make your simulive webinar as engaging as a live one. Let’s get started and turn your recorded content into a live experience everyone will love.
Simulive Webinars Advantages over Live Webinars
✅ You can record, edit, and refine your webinar ahead of time.
✅ Offers greater control over the presentation and timing.
✅ Eliminates the necessity for a reliable internet connection during the broadcast.
✅ Simplifies the incorporation of dynamic content and multimedia elements.
✅ Allows scheduling of webinars at times most convenient for the audience.
✅ Webinars can run even in your absence.
✅ Hosts have the opportunity to engage with participants in real time via live chat.
Essential Tools and Equipment for a Simulated Live Webinar
Getting ready to set up your simulive webinar? Here's a simple checklist to get you started.
- Quality Pre-Recorded Content: Ensure your video is polished, informative, and engaging. This will be the core of your live pre-recorded video webinar.
- Simulated Live Webinar Software: Platforms like LiveReacting make it easier to broadcast your evergreen webinar. No downloads or software installations needed.
- Microphone and Camera (Optional): These can be useful if you plan on adding live interactions or a Q&A segment alongside your evergreen webinar.
Set Up a Simulated Live Webinar Webinar
Ready to make your simulive webinar come alive? Let’s walk through the steps to set it up using LiveReacting, a simple and intuitive tool that helps you broadcast your pre-recorded webinar as if it is live.
Step-By-Step Guide
- Head over to the LiveReacting website and create an account if you don’t already have one. If you already do, simply log in.
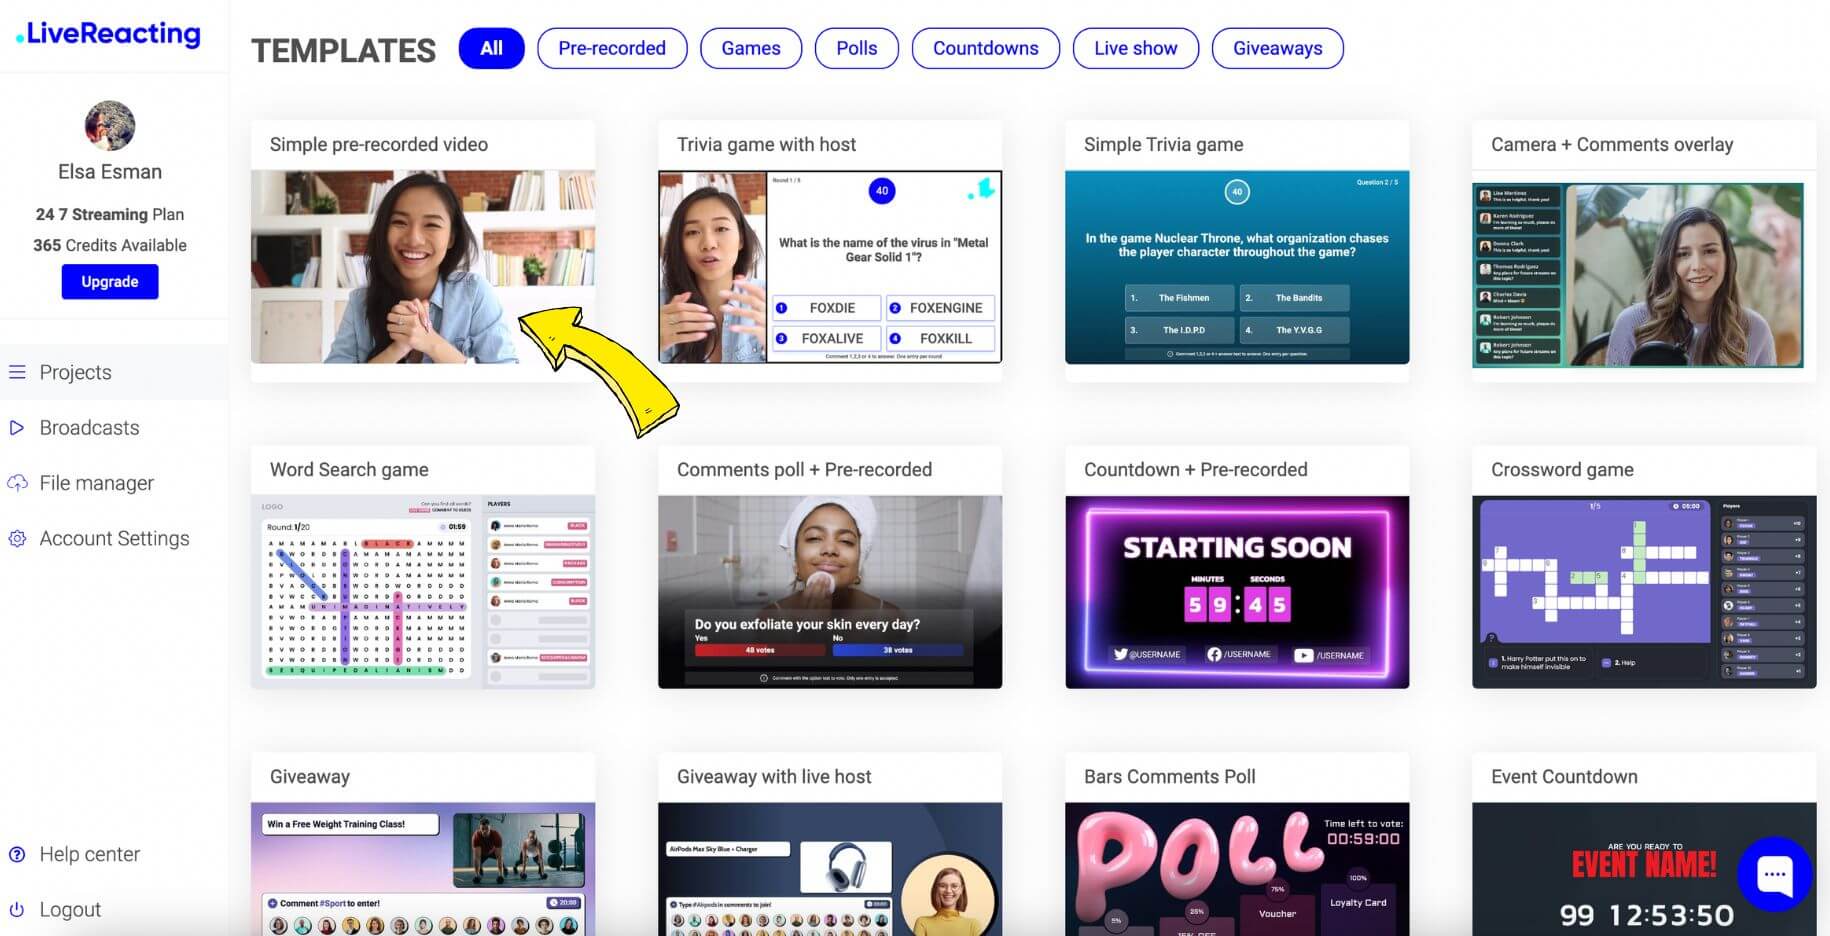
- Once you’re in, click on the "Pre-Recorded Video" template.
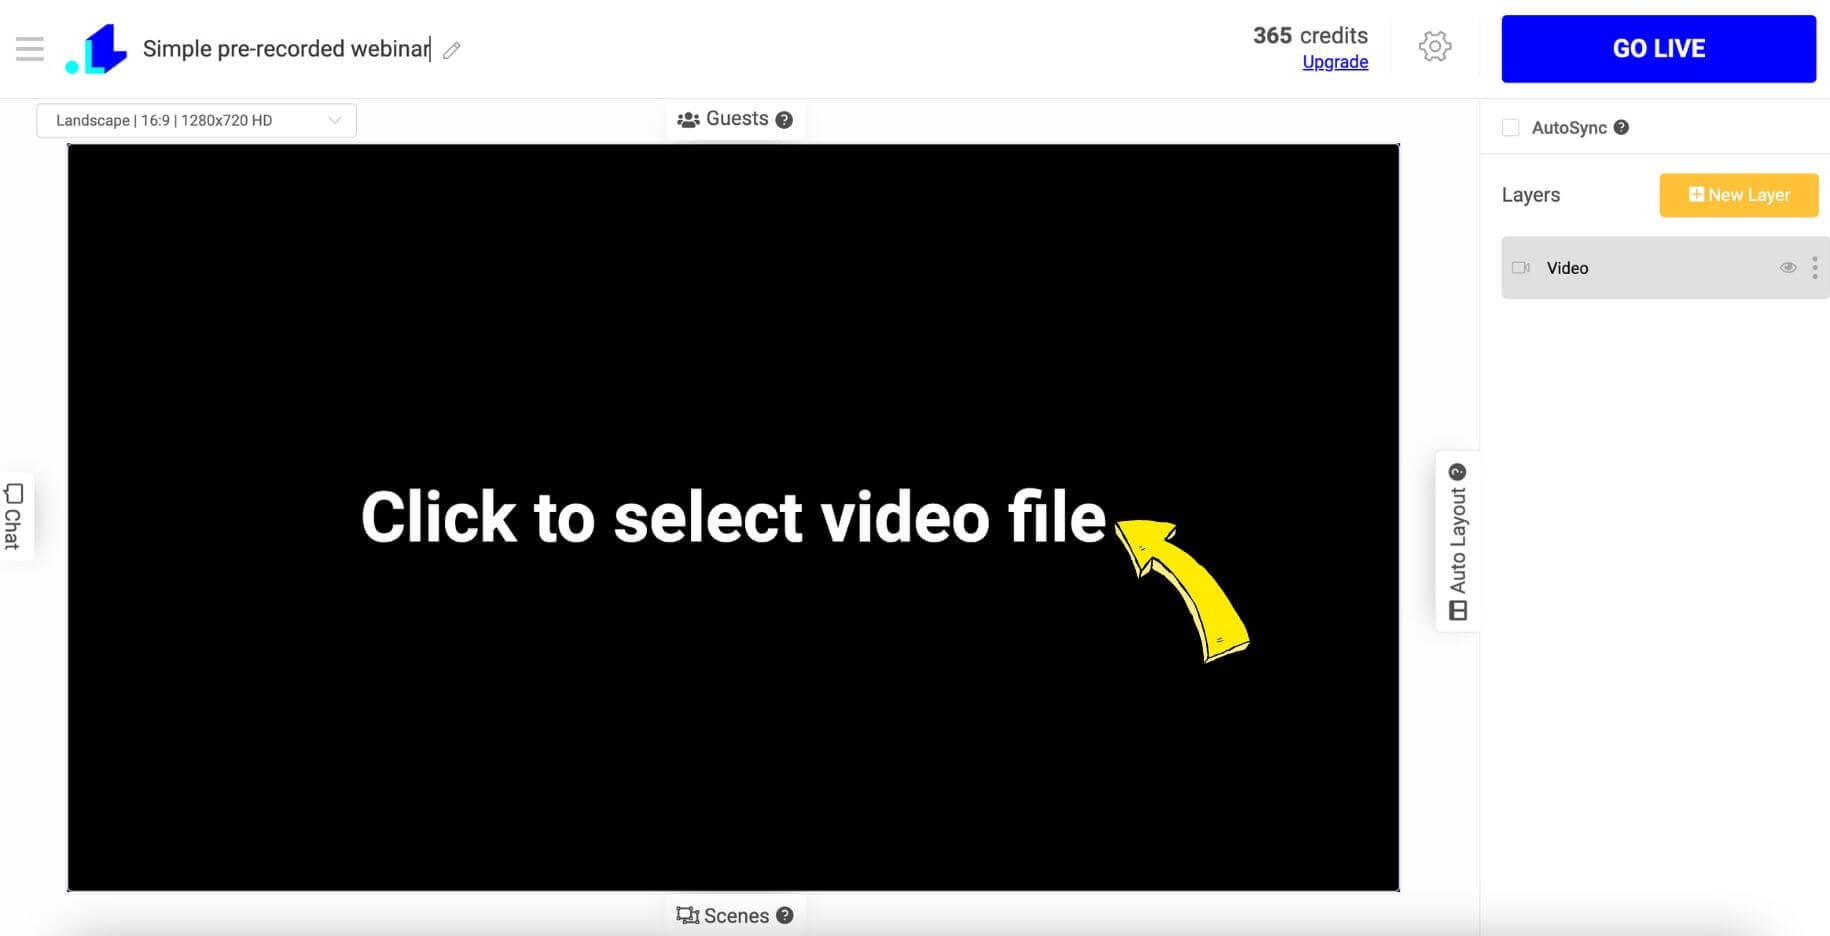
- Click on the “Select video file” and select the pre-recorded webinar file from your computer. Make sure the video is good quality.
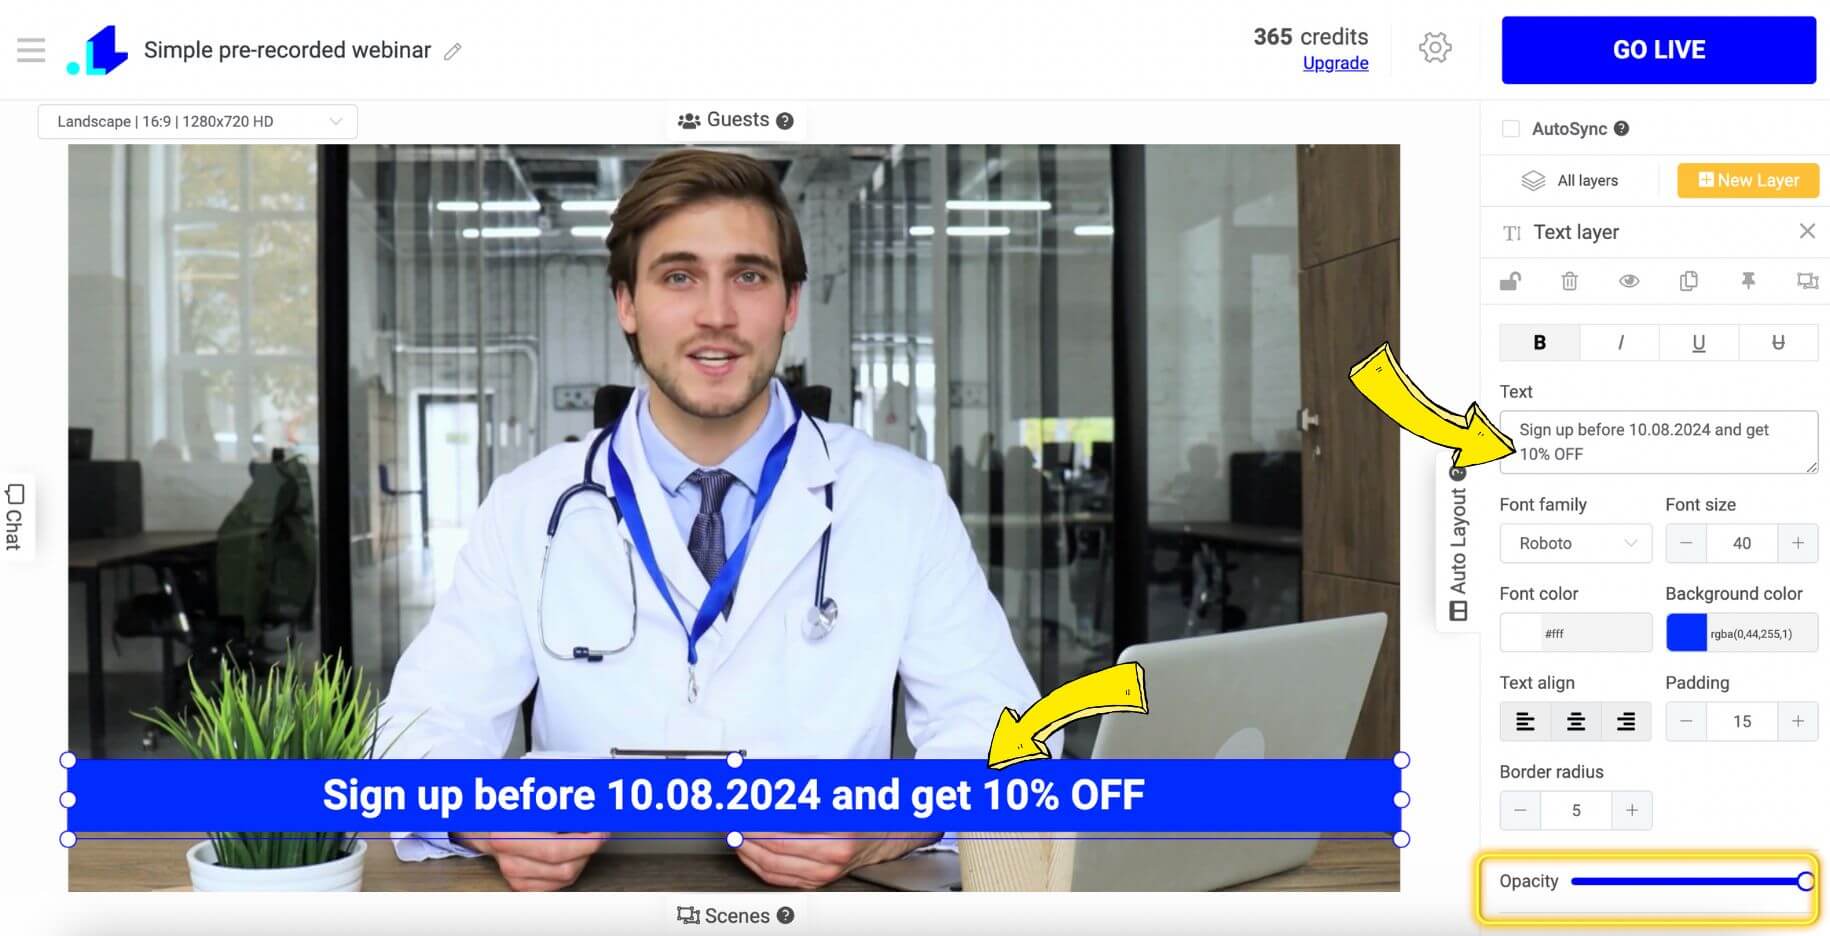
- Customize Your Webinar: Personalize your webinar with branding elements like logos, banners, and custom text to make it look professional. You can adjust the layout, fonts, and colors to match your brand’s style guide.
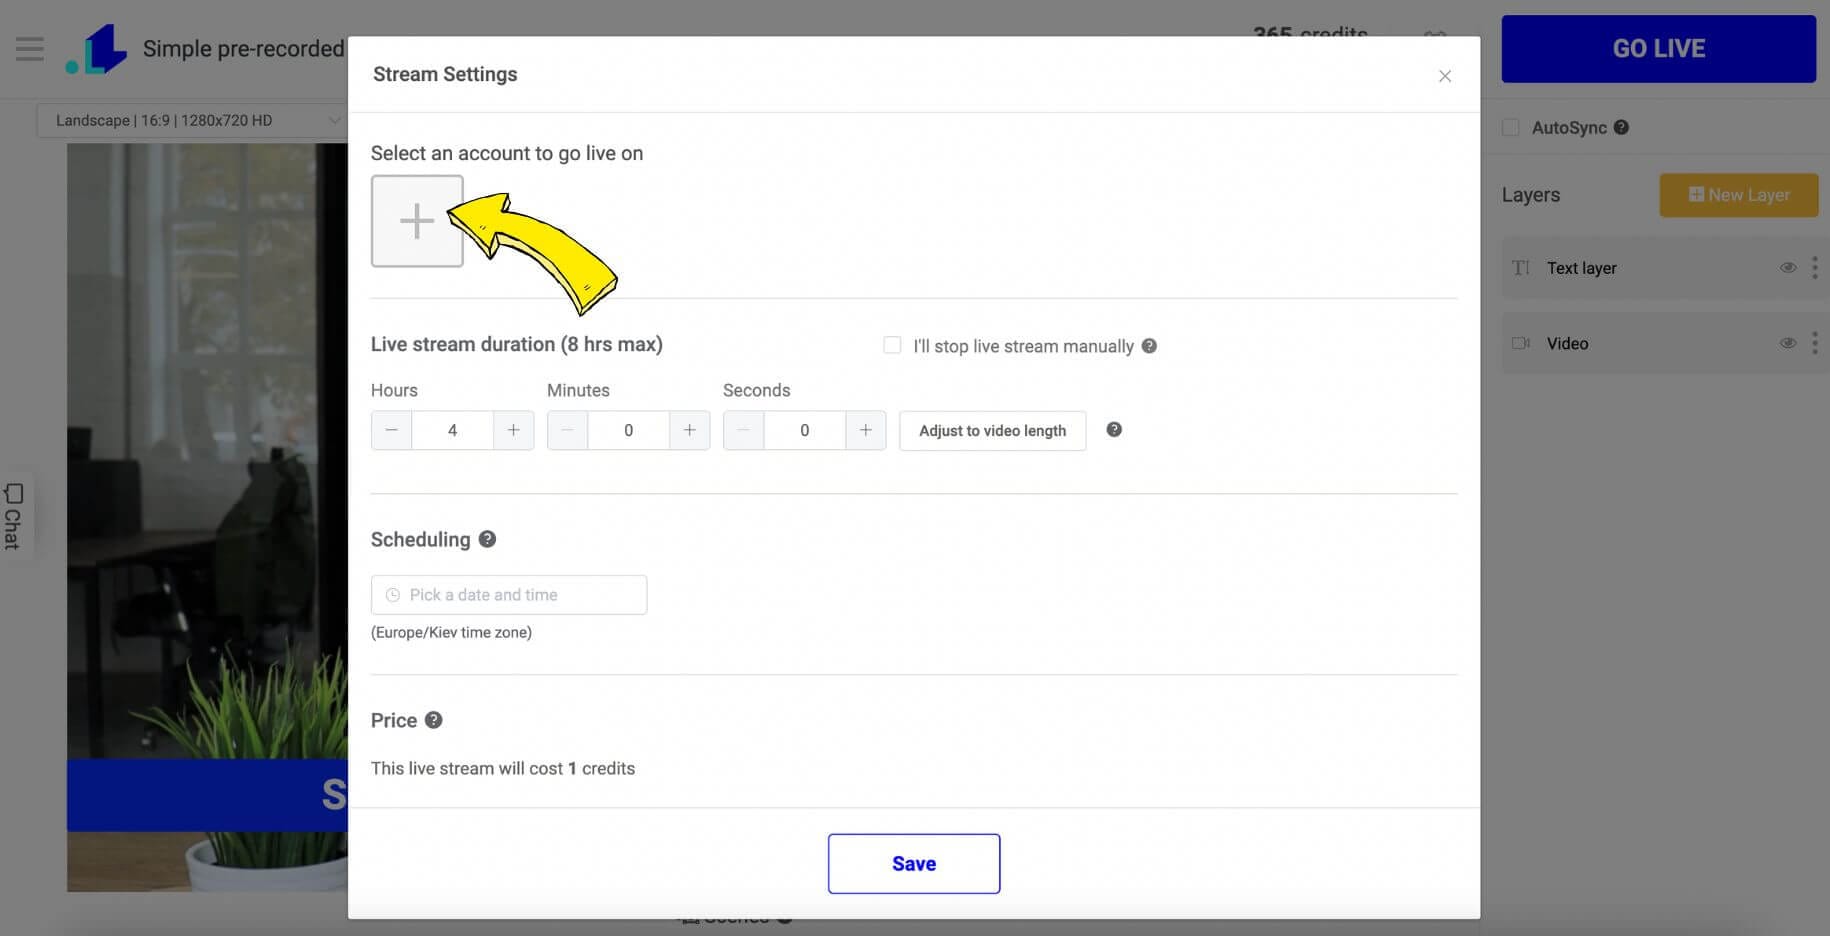
- Choose Your Streaming Platforms: LiveReacting allows you to stream simultaneously to multiple platforms. Choose where you want to go live with a webinar, whether that's on Facebook Live, YouTube Live, or any other supported platform, even custom RTMP. You can select one platform or multiple ones depending on where your audience is most active.
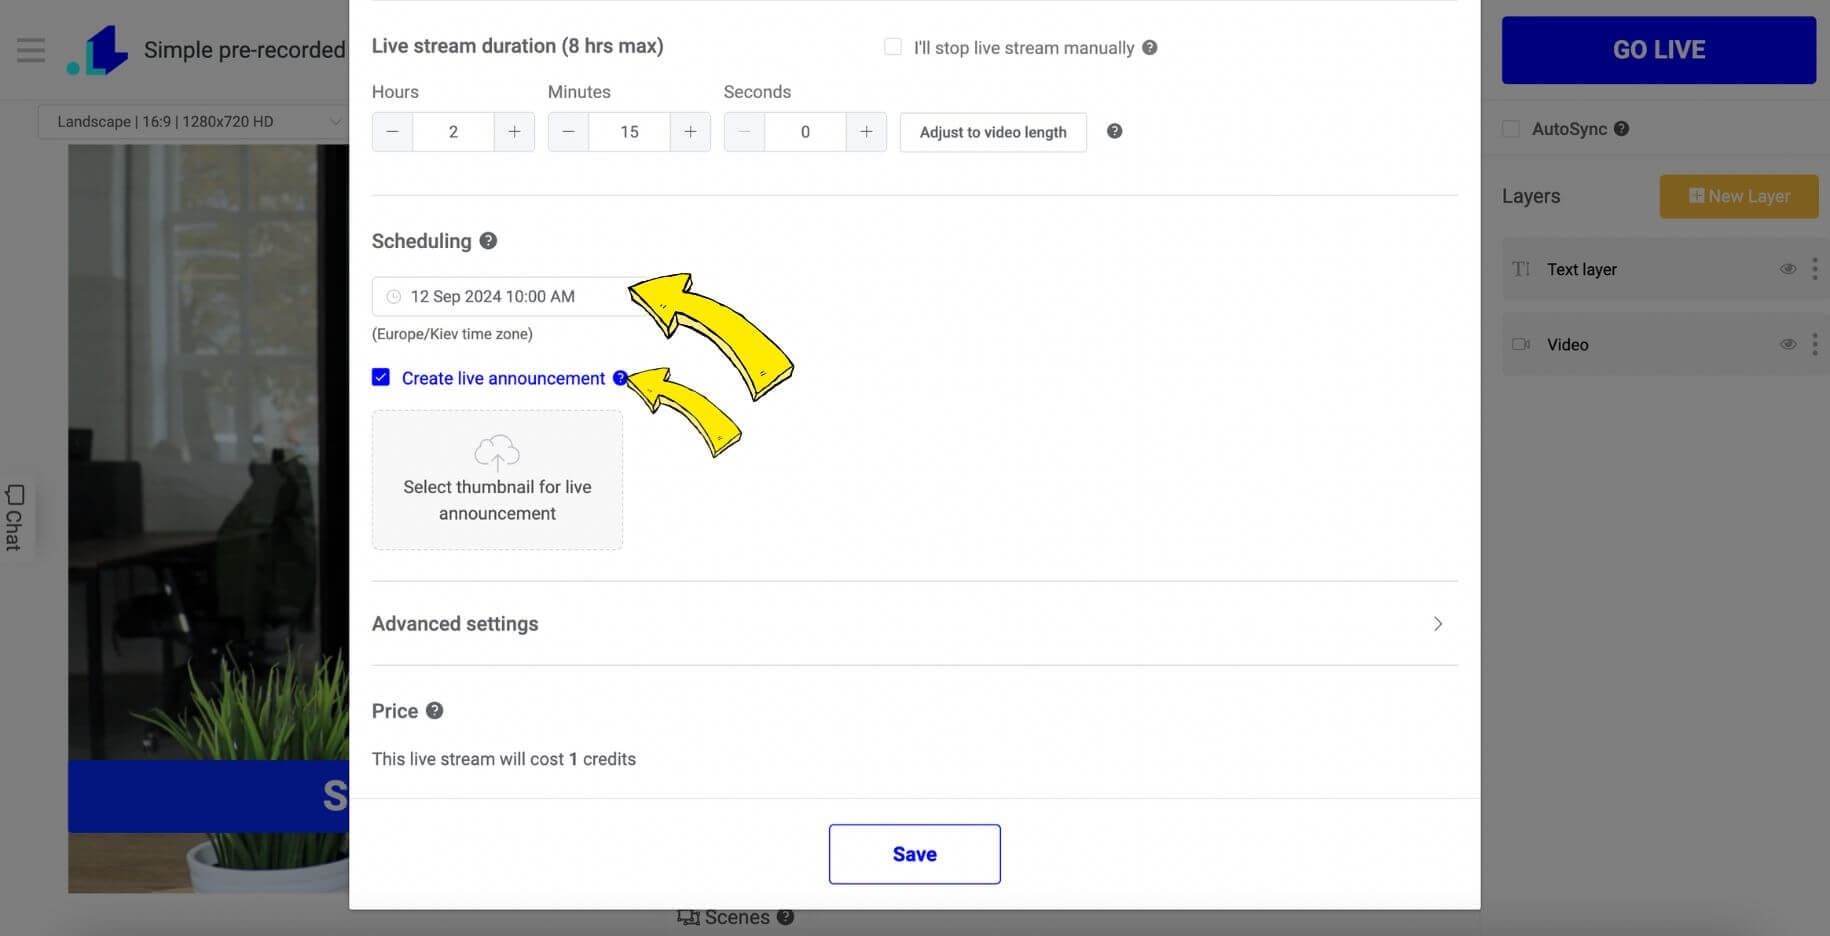
- Set Your Broadcast Schedule. Decide when you want to stream your pre-recorded webinar. You can set the exact date and time, making sure it aligns with your audience’s availability. You can also set up reminders for your attendees to ensure they don’t miss it by enabling the "create live announcement".
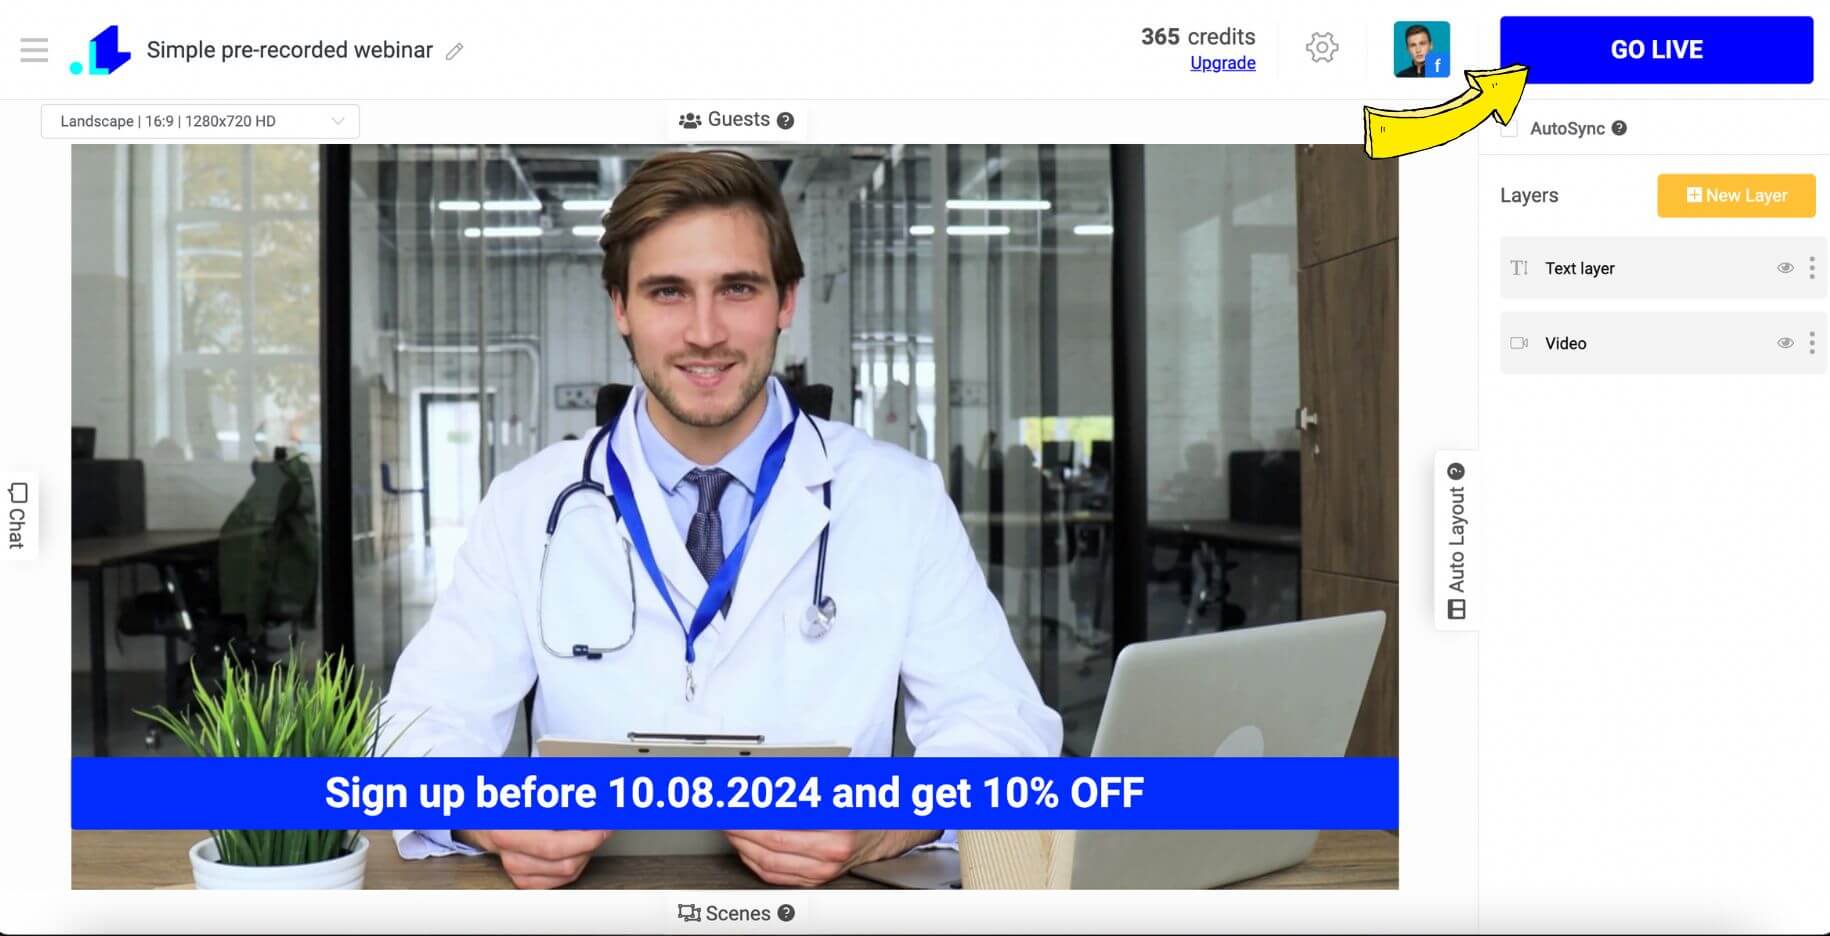
- When everything is set and ready, it's time to go live. Hit the “Go Live” button (or "Schedule" button if your video is scheduled for later) , and your pre-recorded webinar will stream just like a live event.
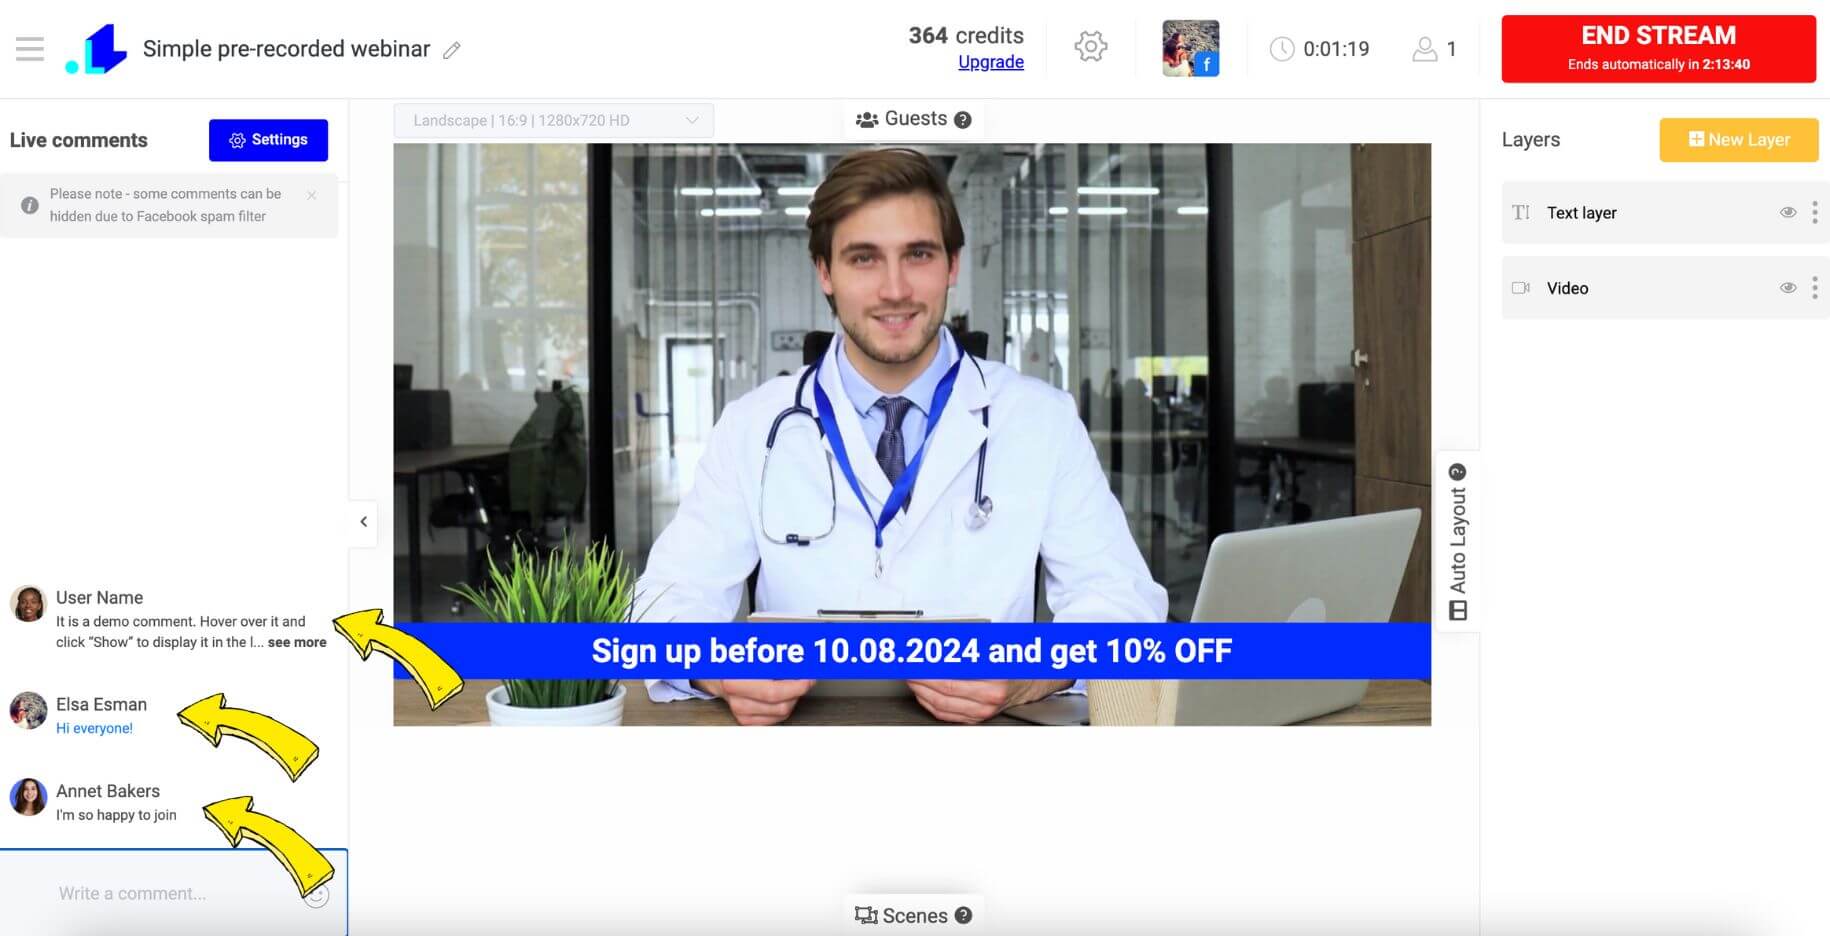
- Engage with Your Audience. During the simulive webinar session, take advantage of the live chat feature to interact with your audience in real-time. Answer their questions, respond to comments, and make your session as interactive as possible directly from the LiveReacting Studio.
With these steps, you’ll have your pre-recorded webinar up and running via LiveReacting, engaging your audience as if it were happening in real-time. Now, you’re ready to deliver a seamless and interactive experience that your webinar viewers will love.
Conclusion
Creating a simulive webinar via LiveReacting is not only a quick way to deliver polished content, but it also allows you to engage with your audience in real-time. By following the steps we’ve outlined, you’ll be able to set up an evergreen webinar that feels live and interactive, without the stress of presenting in the moment. From uploading your high-quality pre-recorded video, adding interactive elements, to streaming across multiple platforms, LiveReacting makes the process of streaming simulive webinars smooth and straightforward.
Transform Your Live Streams with LiveReacting
Join 10,000+ streamers who are boosting engagement and viewership by adding pre-recorded videos, games, polls, and countdowns to their streams.
Try LiveReacting for free today and take your streams to the next level!