
How to create your first interactive video with LiveReacting
Create and stream interactive videos on Facebook
If you are reading this post, you’re ready to create your first interactive Facebook Live video. There’s nothing easier than start live stream with LiveReacting, just 3 simple steps and you are live on Facebook. In this guide, we’ll walk you through the entire process. Without further ado, let’s start our video creation process.
We released a new advanced version of our platform, which allows you to customize everything and even build your template. Please check tutorial for new version HERE
Here is tutorial for old version:
Step #1: Choose the template
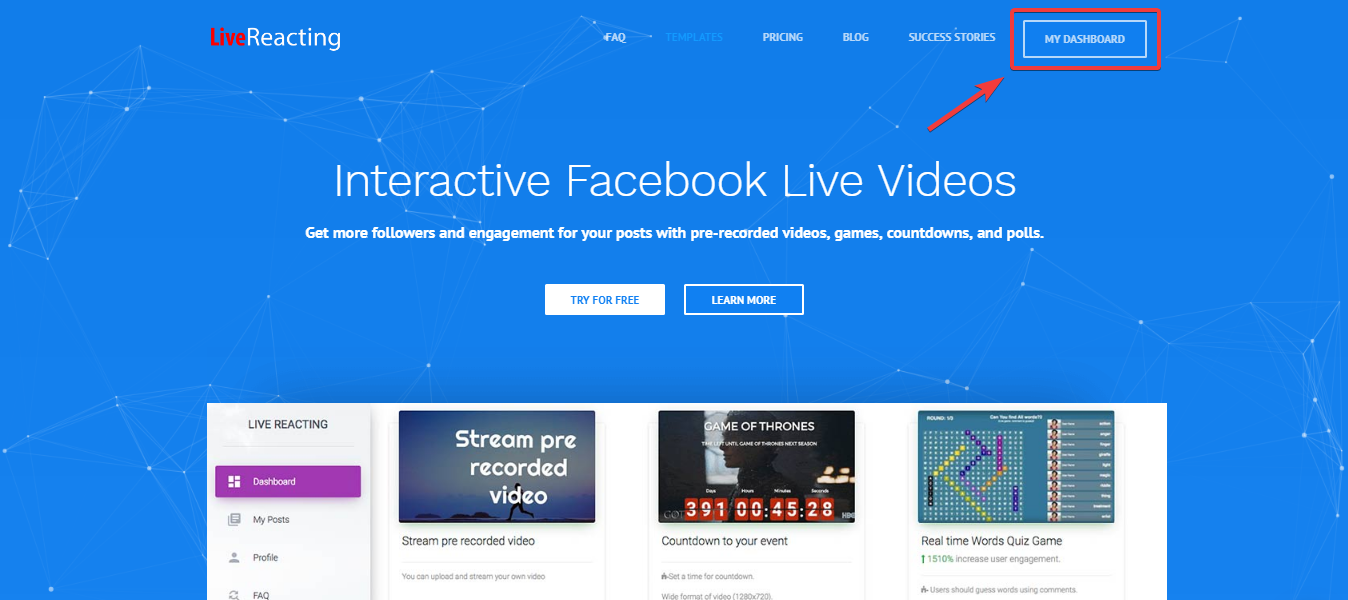
After you sign up for the service, you’ll see “My dashboard” button in the upper right corner. Click the button to move to your dashboard page.
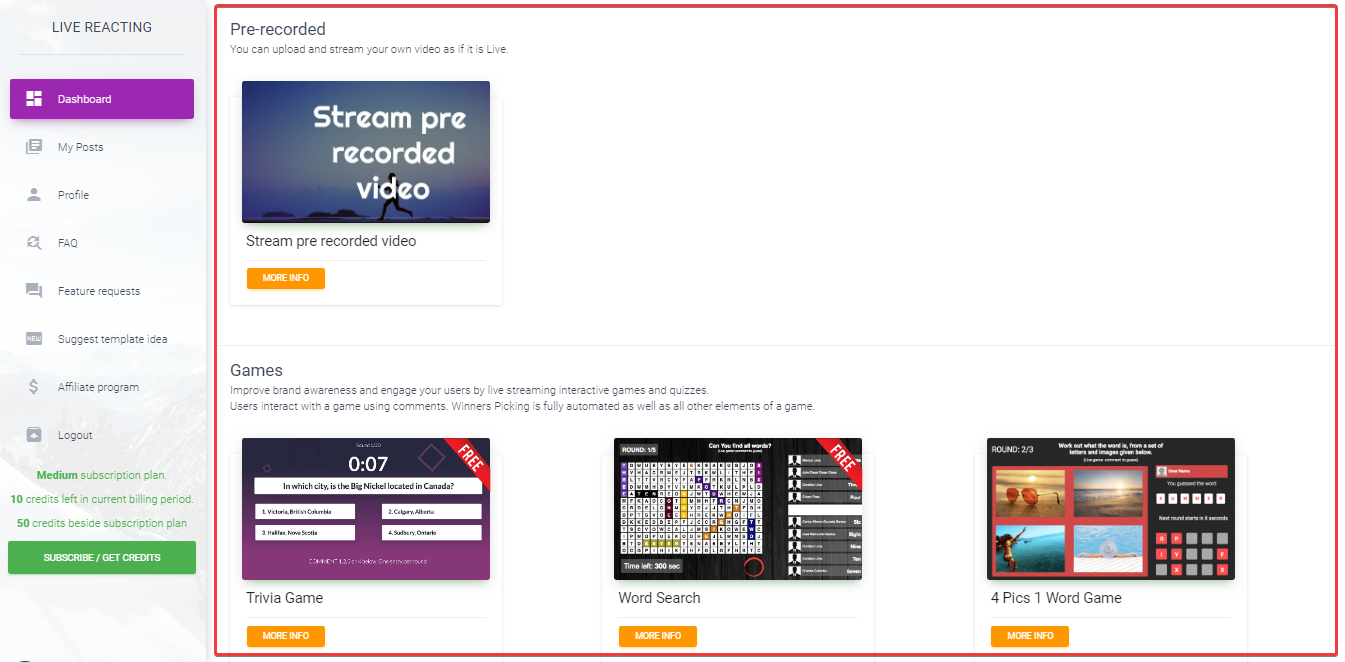
Your dashboard consists of two parts. The left part is a fixed menu. The first thing you’ll see in the dashboard is a whole list of templates we provide. All templates are divided into the categories so that you can easily find the one you need. We have 4 different template types: Games, pre-recorded video streaming; countdown, and polls. To choose a template, you just need to click on the image. To learn more about this or that template, click on “More info” and you’ll go directly to the landing page where all information is gathered.
Step #2: Customize your video [OLD VERSION]
After you click on any template, we’ll ask you to choose a place you want to post your live video to. Then you get to the setting screen. This screen is different for all templates because every template requires various data. So if you want to start a live game, you need to choose questions, set the number of rounds and etc. We won’t go into details as these settings are quite intuitive. Instead, let’s dwell on the settings that are common to all templates.
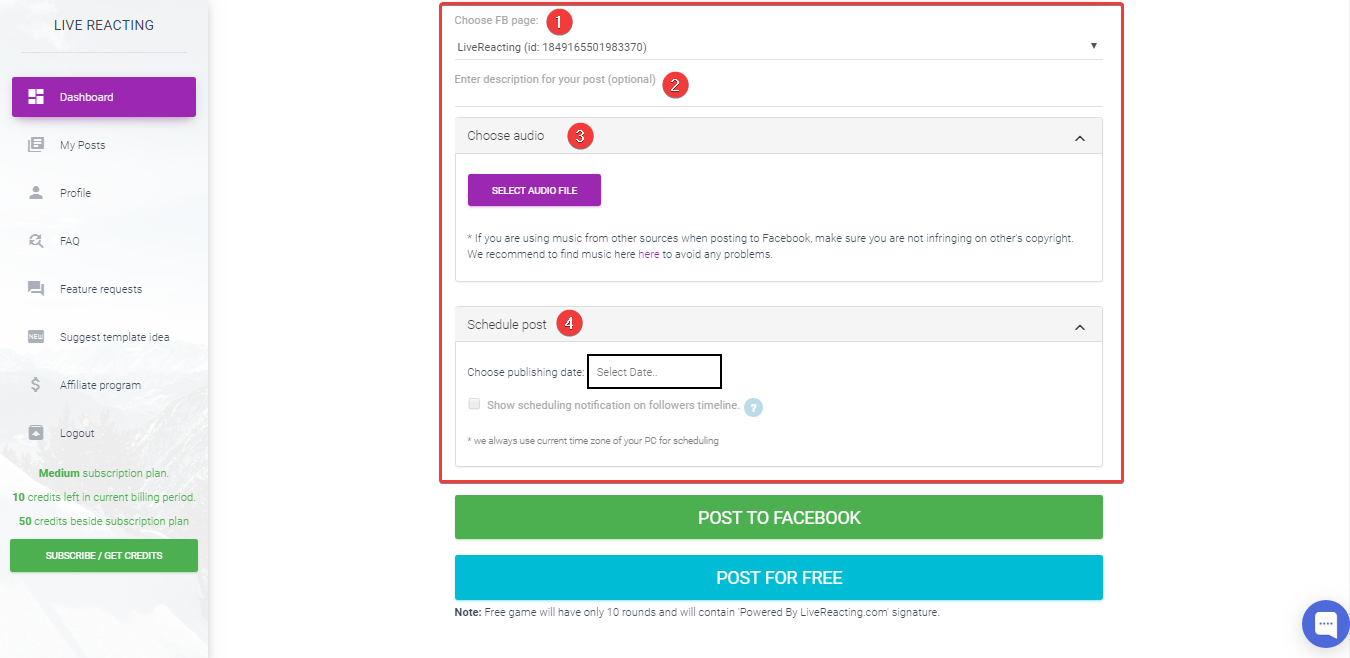
- After you finish with branding and settings, you’ll need to choose the page you want to publish this video to. Don’t skip this step or the video will be published to the first page in your list. When the video is already live, there's no way to change the page it's published to.
- You can also add a description for your video right inside our service. However, we recommend adding the description directly on Facebook as there you can add different emoji, tag people, and etc. You can write the description in advance and add it to your video right after it’s published.
- For all templates except pre-recorded video, you can add an audio file to make your video more exciting. Make sure the audio file you use doesn’t violate copyright law. Otherwise, Facebook will delete your video and credits you used to create this video will also be lost. We recommend using the files from Sound Collection of Facebook Creator Studio to avoid these problems.
- Another important step here is the schedule option. All users with monthly subscriptions have access to scheduling feature. We consider the time on your PC/device so make sure it’s correct.
- Double-check everything before publishing your video. AFTER VIDEO IS PUBLISHED YOU CANNOT EDIT IT. The only way to change anything is to finish that video and create a new one. In lots of templates we made a special preview option in the bottom right corner, so you can see how the video will look before publishing.
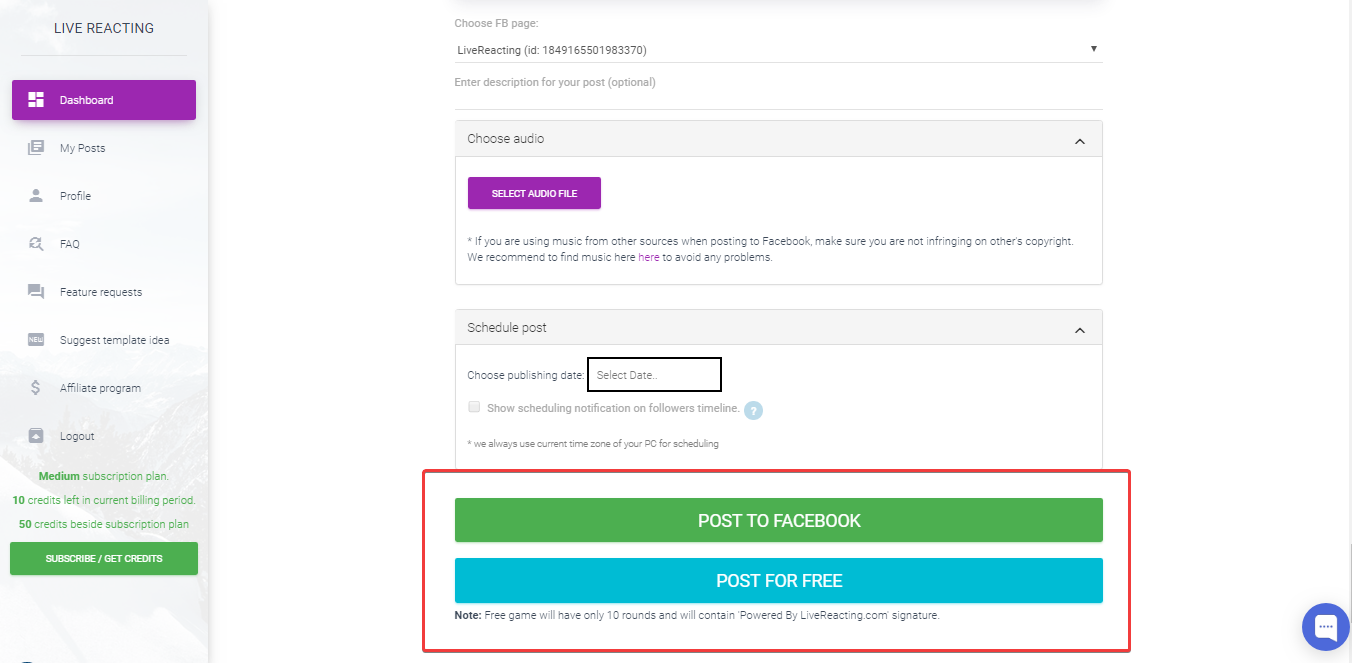
Step #3: Publish your live video
When you sign up for LiveReacting you get your first demo credit so that you can see service in action and decide whether to purchase. To use this demo post, click on “Post for free.” The limitation depends on the type of template you want to use, it will be specified under “Post for free” button. Click “Post to Facebook” to live stream a video without any limitations. The number of credits this or that stream will cost you depends on the video duration or the number of rounds for games. You can always see how many credits the video will cost you before publishing.
What else you can find on your dashboard
Now let’s get back to the left part of your dashboard, the menu. Here you can find all required information about your past live streams, subscription details, and lots of other important information.
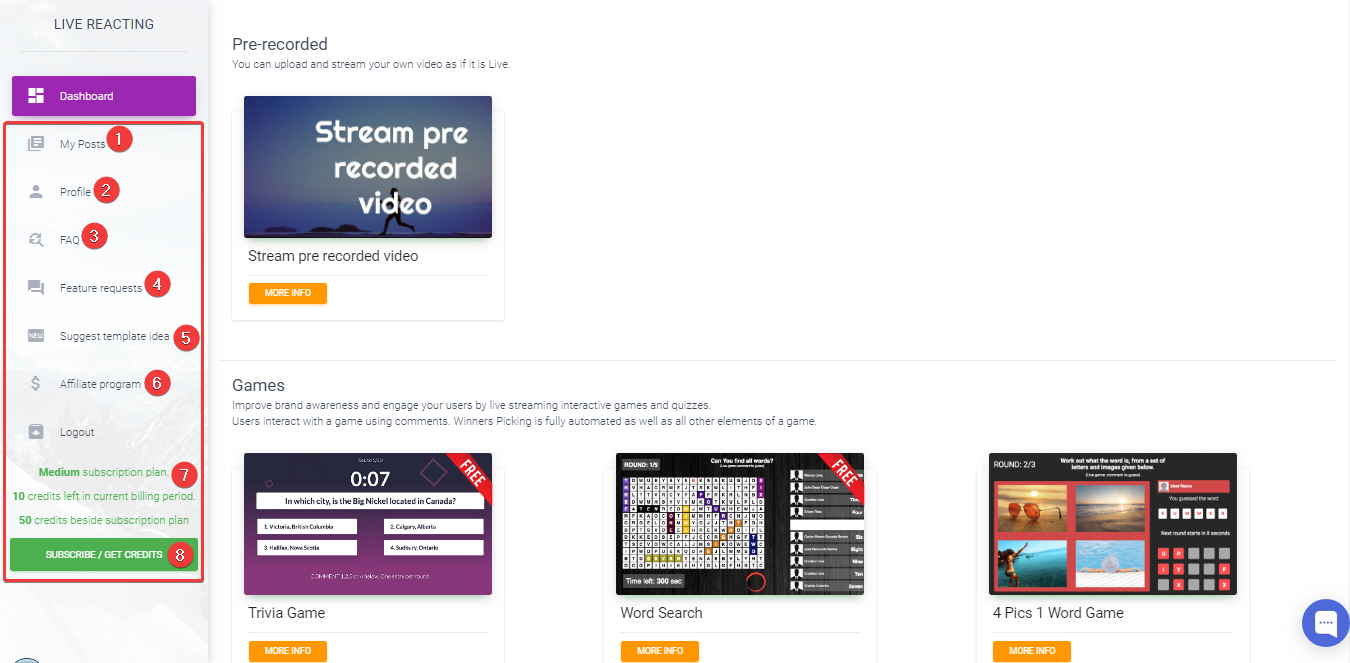
- In my posts section, we store all your live streams with the date when it was published, page ID, and status. Here you can also restart your previous video to save your time. The important thing to note here is that your video will be republished with the same parameters.
- In the profile section, you can find the information about your subscription and manage your payment details.
- To help you quickly find answers to the most popular question, we placed FAQ to your dashboard. By clicking this button, you’ll get to the new tab where we divided the answers into categories so that you can easily find the required one.
- Our goal is to make our tool a place where you can find everything you need for Facebook Live. That’s why we created a special board where you can upvote the feature requests you like as well as add a new one to the list. When the feature is accepted, you’ll see “In development” tag near it.
- The same works here, do you want us to add a new template? Suggest your template ideas to this board, other users will read it and upvote. Then our tech and marketing teams will discuss your idea and decide is it possible to implement it or not.
- We’re always open to cooperation with enthusiastic and active digital marketers, that’s why we created an Affiliate program. You can easily become our partner in a few clicks. Find more information about our program by clicking “Affiliate program” button on the menu.
- Green lines are all about your subscription details. You can always check the number of credits left within the current period here in your dashboard. If you’ve run out of your plan’s limits, you can always buy extra credits, which are also displayed on the left.
- You can always easily subscribe to any of our subscription plans or get extra credits right inside your dashboard. Click on “Subscribe/get credits” and choose any option you need in a few clicks.
Hope that this guide will help you to easily create your first interactive live video. If you have any questions during the process of video creation, you can always contact our support team via live chat in the bottom right corner. Good luck and high engagement for your live videos!
Transform Your Live Streams with LiveReacting
Join 10,000+ streamers who are boosting engagement and viewership by adding pre-recorded videos, games, polls, and countdowns to their streams.
Try LiveReacting for free today and take your streams to the next level!